Ghost Pretzel Treats: A Spooktacular Delight
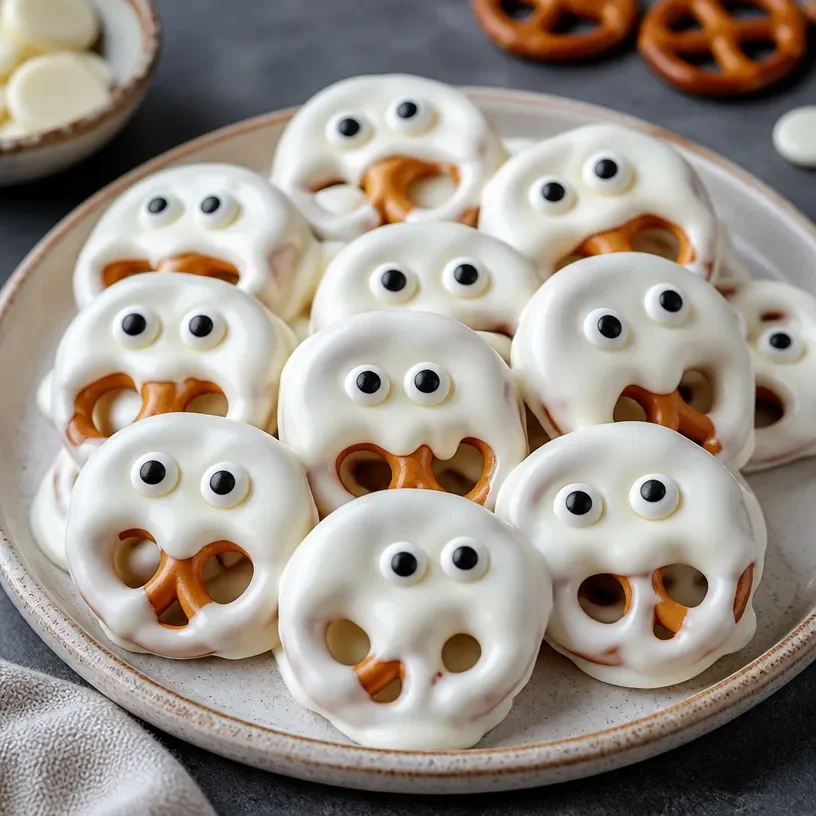
Hey there, food lovers! Welcome back to my cozy corner of the internet, where we’re all about simple, honest cooking that brings a sprinkle of joy to our lives. Today, I’m thrilled to share a delightfully spooky treat that’s perfect for Halloween parties or just a fun family activity in the kitchen—Ghost Pretzel Treats! 👻🍬
A Little Kitchen Adventure
Let me take you on a little trip down memory lane. When I was a kid, Halloween was one of my favorite times of the year. The crisp autumn air, the scent of pumpkin spice wafting through the house, and the thrill of dressing up in silly costumes to collect candy from every neighbor. But what I loved the most were the special treats that appeared around this time of the year. My mom would often get us involved in making fun and spooky snacks. One year, we made ghost-shaped cookies, and while they may not have been perfect, the laughter and joy we shared while decorating them is something I’ll never forget!
Fast forward to today, and here I am, creating an easy, no-fuss recipe that brings back those same happy memories. Ghost Pretzel Treats are not only adorable but incredibly simple to make. Let’s get started!
Ingredients
Before we dive into the cooking, here’s what you’ll need to whip up these spooky snacks:
-
24 mini pretzels: These are the base of our ghosts. You can use regular-sized pretzels if you want bigger treats, but mini ones are the perfect bite-sized delight!
-
12 oz white candy melts: The creamy white coating gives our ghosts their ghostly appearance. If you can’t find candy melts, you can substitute with white chocolate chips or almond bark, just be sure to adjust your melting time.
-
Candy eyes: These are the finishing touch that brings your ghosts to life! Use googly candy eyes for a fun look. If you can’t find candy eyes, chocolate chips work great too!
Step-by-Step Instructions
Alright, let’s get our aprons on and get to cooking!
-
Prep Your Work Area
Start by clearing a space on your kitchen counter. Grab some parchment paper and lay it out. This is where you’ll drop your pretzel treats once coated. -
Melt the Candy Melts
In a microwave-safe bowl, place your 12 oz of white candy melts. Heat them in the microwave for 30-second intervals, stirring in between until they’re fully melted and smooth. This is where a little chef hack comes in: don’t overheat! If your melts aren’t melting seamlessly, try adding a teaspoon of vegetable oil for that smooth consistency. -
Coat the Pretzels
Once your candy melts are ready, it’s time to dip those pretzels! Grab a mini pretzel and dip it into the melted candy, fully covering it. You can use a fork or a spoon to make this part easier and keep the mess to a minimum. Let the excess drip off before placing it on the parchment paper. -
Add the Eyes
While the coating is still wet, add two candy eyes to each pretzel. I like to place them slightly apart for that classic ghostly look! If the candy coating hardens too quickly, just pop it back in the microwave for a few seconds to soften again. -
Let Them Hardern
Allow your Ghost Pretzel Treats to cool completely. You can either let them set at room temperature or pop them in the fridge for about 15-20 minutes until they’re fully firm. -
Serve and Enjoy!
Once they’re set, plate them up! You can arrange them in a spooky-themed dish for added flair. These treats look great on a Halloween-themed platter or even as part of a party table!
Serving Suggestions
These Ghost Pretzel Treats are amazing on their own, but if you want to go the extra mile, try:
-
Creating a Spooky Scene: Set them on a bed of black or orange tissue paper to mimic spooky cobwebs or grave dirt. It adds a great touch for any Halloween celebration!
-
Pairing with Hot Cocoa: Serve these treats alongside a warm, creamy mug of hot cocoa for the perfect fall evening snack.
Recipe Variations
The best part about cooking is experimenting! Here are a few creative twists you can try with your Ghost Pretzel Treats:
-
Chocolaty Ghosts: Use dark or milk chocolate melts instead of white for a deliciously different flavor.
-
Peanut Butter Twist: Before dipping your pretzel, spread a thin layer of peanut butter on one side for a creamy surprise!
-
Drizzle Fun: Once your ghosts have set, drizzle some colored candy melts or chocolate over them for an extra pop of color!
-
Sprinkle Magic: Before the coating sets completely, sprinkle some edible glitter or Halloween-themed sprinkles on top for a festive touch.
-
Colorful Eyes: Switch things up using colored candy eyes or even using dried fruit pieces to create unique expressions on your ghosts.
Chef’s Notes
Oh, the memories I have from my kitchen adventures! I remember once trying to make these treats with my old-school chocolate fountain. Let’s just say, it did not turn out as planned and resulted in a mini chocolate explosion! But that’s the beauty of cooking, isn’t it? Sometimes you make a mess, but most importantly, you create laughter and joy in the process.
Now, between you and me, these treats have evolved quite a bit over the years! Originally, I would attempt to pipe out little ghost figures on wax paper, and let’s just say they looked more like blobs than phantoms. But hey—if you can eat it, you can laugh about it, right?
FAQs and Troubleshooting
-
What if the candy melts won’t melt properly?
Sometimes, they can seize up. Make sure you’re using a microwave-safe bowl and heating in intervals. Adding a little vegetable oil can help achieve a smoother texture. -
How do I store these Ghost Pretzel Treats?
Keep them in an airtight container at room temperature. They should last about a week—if they make it that long without being gobbled up! -
Can I use regular pretzels instead of mini?
Absolutely! You can use regular pretzels for a larger version of these treats. Just give them a little extra coating! -
I can’t find candy eyes, what can I use instead?
No worries! Chocolate chips or bits of dried fruit can create a similar effect. Get creative!
Nutritional Info
While I love enjoying these treats, it’s good to keep nutrition in mind. Each mini Ghost Pretzel Treat is approximately 60 calories. Remember, moderation is key!
So there you have it—Ghost Pretzel Treats that are as fun to make as they are to eat! I hope you enjoyed this little kitchen adventure as much as I have. Whether you’re making these for a party or just to enjoy at home, they are sure to add some spooky fun to your day. Happy cooking, and may all your meals be filled with warmth, flavor, and a dash of excitement!
Until next time, let’s keep spreading that rustic flavor! 🍲✨
PrintGhost Pretzel Treats
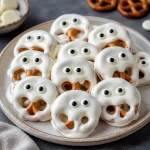
A fun and easy Halloween treat made with pretzels, candy melts, and candy eyes. Perfect for parties or family activities.
- Prep Time: 10 minutes
- Cook Time: 5 minutes
- Total Time: 15 minutes
- Yield: 24 servings 1x
- Category: Dessert
- Method: No Cooking
- Cuisine: American
- Diet: Vegetarian
Ingredients
- 24 mini pretzels
- 12 oz white candy melts
- Candy eyes
Instructions
- Prep your work area by laying out parchment paper.
- Melt the candy melts in a microwave-safe bowl, heating in 30-second intervals until smooth.
- Coat the mini pretzels in the melted candy, then drip off excess before placing on parchment.
- Add two candy eyes to each pretzel while the coating is still wet.
- Let the pretzels cool completely either at room temperature or in the fridge for about 15-20 minutes.
- Serve and enjoy your spooky treats!
Notes
Store in an airtight container at room temperature for about a week.
Nutrition
- Serving Size: 1 pretzel
- Calories: 60
- Sugar: 5g
- Sodium: 150mg
- Fat: 3g
- Saturated Fat: 2g
- Unsaturated Fat: 1g
- Trans Fat: 0g
- Carbohydrates: 9g
- Fiber: 0g
- Protein: 1g
- Cholesterol: 0mg
Keywords: Halloween, Pretzel Treats, Desserts