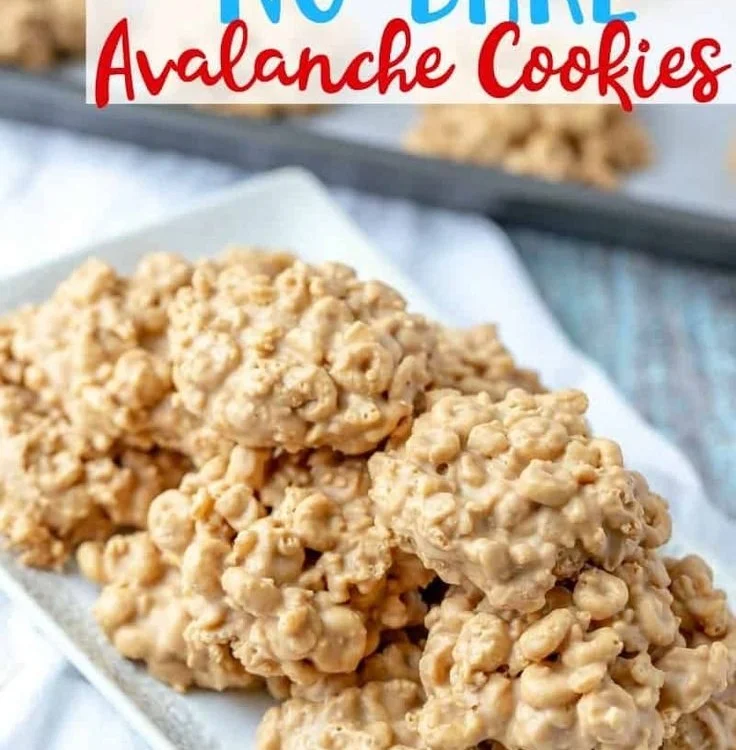
No-Bake Avalanche Cookies: A Sweet Adventure!
Hello, my fellow food enthusiasts! It’s Nina here, your friendly kitchen companion from RusticFlavor, ready to embark on another culinary adventure. Today, we’re diving into a delightful treat that combines nostalgia and ease: No-Bake Avalanche Cookies! These little bundles of joy are perfect for sharing and evoke memories of carefree childhood days when sweet treats accompanied every joyful moment. Let’s dive right in!
A Trip Down Memory Lane
I can still remember the first time I tasted a version of these delightful cookies. It was during a summer afternoon at my grandma’s house, where the warm sun spilled through the window and filled the kitchen with a soft glow. Grandma was the queen of no-bake desserts. One day, she gathered us around the kitchen island and started mixing a few ingredients together. The warm, comforting smell of peanut butter wafted through the air as we patiently waited for the magic to happen.
As she introduced us to these "Avalanche Cookies," I remember the excitement on my cousins’ faces as we licked the peanut butter off our fingers. The crunchy texture from the Rice Krispies combined with the sticky sweetness of the Biscoff spread created a heavenly bite. That day, we didn’t just make cookies; we created memories that would last a lifetime. Inspired by my grandma’s simple yet amazing recipe, I knew I had to share this joy and comfort with all of you!
Ingredients
Before we get started, let’s gather our ingredients! Here’s what you’ll need for a scrumptious batch of No-Bake Avalanche Cookies:
-
3 cups Rice Krispies
- These little crispy gems give our cookies that satisfying crunch. If you want a gluten-free option, simply swap them for a gluten-free puffed rice cereal!
-
2 cups Honey Nut Cheerios
- The sweetness of these Cheerios elevates the flavor and adds an extra layer of crunch. Feel free to use plain Cheerios if you prefer a less sweet option!
-
1 cup peanut butter
- Creamy or crunchy, it’s your choice! For a nut-free alternative, sunbutter or tahini work beautifully.
-
1 cup Biscoff spread
- This heavenly cookie butter adds depth and a delightful caramel flavor. Can’t find Biscoff? Try using Nutella or another cookie spread you love.
-
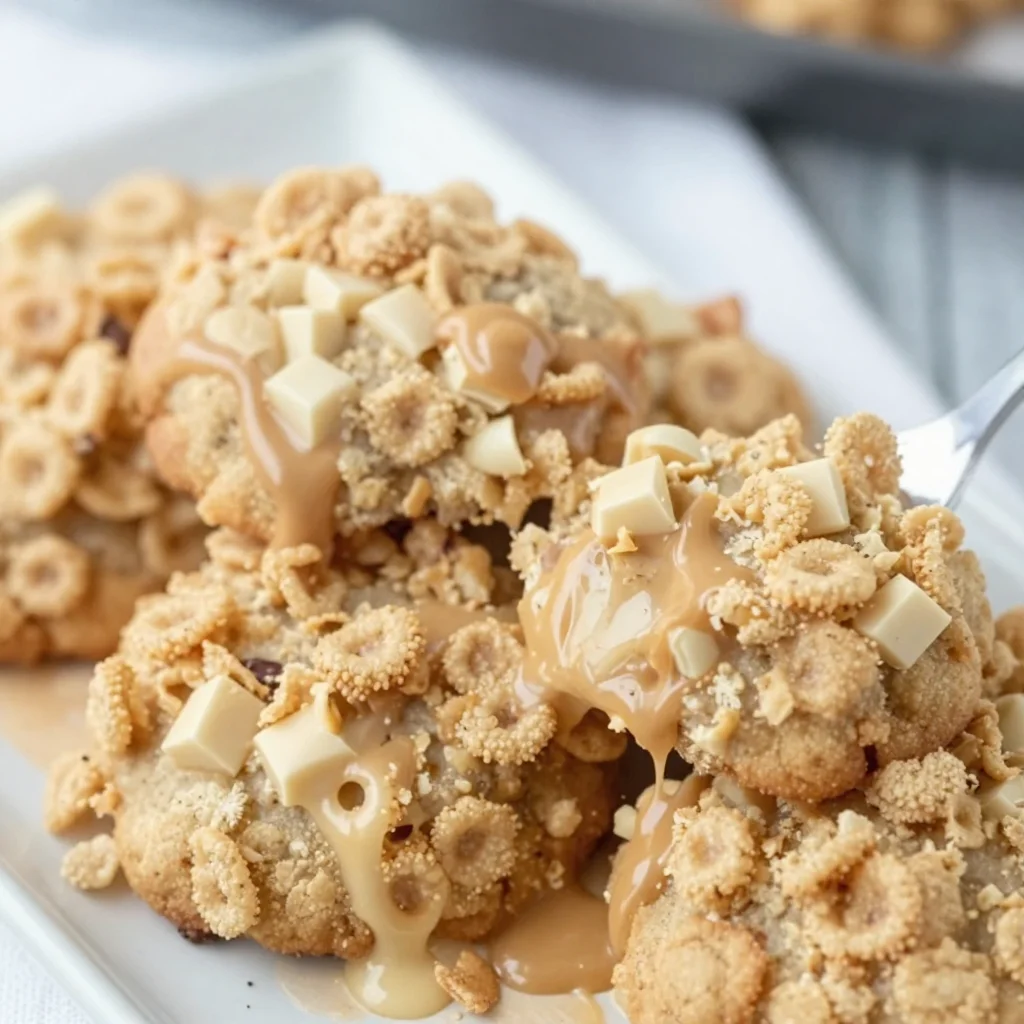
1 cup white chocolate chips
- These little morsels of sweetness melt in your mouth. If you’re feeling adventurous, dark or milk chocolate chips are a delicious twist!
Make sure you have everything ready, and let’s create some mouthwatering magic!

Step-by-Step Instructions
-
Prep Your Space
- Begin by lining two baking sheets with parchment paper. This will prevent any stickiness when forming your cookies. It also makes for easy cleanup—my favorite part!
-
Combine the Cereals
- In a large mixing bowl, combine the Rice Krispies and Honey Nut Cheerios. Gently fold them together using a spatula or wooden spoon. The crunch and sweetness blend beautifully, creating a fun base for our cookies.
-
Melt the Peanut Butter and Biscoff Spread
- In a microwave-safe bowl, combine the peanut butter and Biscoff spread. Heat it in the microwave for about 30 seconds, then stir until combined. This step allows the spreads to blend together seamlessly. Pro tip: This mixture should be smooth but still slightly thick.
-
Mix It Up
- Pour the warm peanut butter and Biscoff mixture over the cereal blend. Gently fold until every cereal piece is coated. I find that using your hands works wonders here, so feel free to dive in and get a little messy!
-
Add the Chocolate Chips
- Once everything is coated, gently fold in the white chocolate chips, letting their sweetness mix in with the cookie batter. You can always add a few extra for good measure—who doesn’t love more chocolate?
-
Form the Cookies
- Grab small handfuls of the mixture and shape them into small patties or balls, roughly the size of a golf ball. Place them on the prepared baking sheets, spacing them out a bit. Remember, they will set and firm up as they cool.
-
Chill Out
- Pop the baking sheets into the refrigerator for about 30 minutes, or until you can’t resist any longer and just have to take a bite! This helps the cookies firm up so they hold their shape better.
-
Serve and Enjoy!
- Once chilled, you can serve them immediately or store them in an airtight container for up to a week. I love to prepare a batch in advance for guests or cozy movie nights at home.
Serving Suggestions
To plate your No-Bake Avalanche Cookies, consider stacking them neatly on a cake stand or arranging them on a vibrant platter. For a touch of extra flair, you could sprinkle a few crushed nuts or drizzles of melted chocolate on top. Serve them with a glass of cold milk or a warm cup of coffee for the ultimate indulgence!
Recipe Variations
Now that you’ve mastered the classic version, let’s get creative! Here are some fun variations for your Avalanche Cookies:
-
Add Nuts: Toss in 1 cup of chopped nuts like almonds, pecans, or walnuts for an added crunch and nutty flavor.
-
Dried Fruits: Mix in dried cranberries, raisins, or even chopped dates for a fruity twist that adds a chewy texture.
-
Coconut Flakes: Stir in 1 cup of sweet or unsweetened shredded coconut for a tropical flair.
-
Spiced Version: Add a pinch of cinnamon or a teaspoon of vanilla extract to the peanut butter mixture for a warm, comforting flavor.
-
Chocolaty Goodness: Swap out the white chocolate chips for semisweet or dark chocolate for a richer taste.
Chef’s Notes
Every recipe has its story, and each time I make these cookies, I can’t help but reminisce about the stories my grandma shared while whipping them up. This recipe has evolved over time as I’ve experimented with different flavors and textures. It’s the kind of treat that invites creativity, so don’t hesitate to make it your own!
And a funny kitchen moment? One time, I mixed up the measurement for the Biscoff spread and accidentally dumped in way too much! Let’s just say we had what my family calls "Biscoff Avalanche Cookies" — richer and sweeter than ever! Lesson learned: It’s always good to measure and taste as you go!
FAQs and Troubleshooting
Q: Can I use crunchy peanut butter?
Absolutely! Crunchy peanut butter adds a delightful texture variety and is a great way to enhance the overall flavor.
Q: My cookies are falling apart. What did I do wrong?
Likely, the mixture wasn’t fully combined. Make sure everything is mixed well, and if the mixture feels too dry, try adding a bit more melted peanut butter or Biscoff spread.
Q: Can I make these cookies dairy-free?
Yes! Use dairy-free chocolate chips and substitute with a vegan version of peanut butter. Biscoff spread is also dairy-free!
Q: How do I store the cookies?
Store them in an airtight container in the refrigerator for up to a week. They also freeze well for longer storage—just make sure to place parchment paper between layers to prevent sticking!
Nutritional Info (Optional)
For those who like to keep track of their nutrition, here’s a rough estimate for one cookie (when making about 24 cookies):
- Calories: 150
- Fat: 7g
- Carbohydrates: 20g
- Protein: 3g
(Nutritional values may vary based on specific ingredient brands and measurements.)
So there you have it, my friends! No-Bake Avalanche Cookies are simple, heartwarming, and utterly delicious, perfect for any occasion or just because you feel like treating yourself. Whether you’re sharing them with family during a cozy gathering or savoring every bite on a lazy afternoon, these cookies are sure to bring comfort and joy.
Let’s get cooking, and remember: every recipe holds a bit of magic—let this one fill your home with warmth and sweetness! Happy baking! 🍪✨
PrintNo-Bake Avalanche Cookies
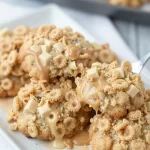
Delightful no-bake cookies that combine the crunch of Rice Krispies and Cheerios with the creamy sweetness of peanut butter and Biscoff spread.
- Prep Time: 15 minutes
- Cook Time: 0 minutes
- Total Time: 30 minutes
- Yield: 24 cookies 1x
- Category: Dessert
- Method: No-Bake
- Cuisine: American
- Diet: Vegetarian
Ingredients
- 3 cups Rice Krispies
- 2 cups Honey Nut Cheerios
- 1 cup peanut butter
- 1 cup Biscoff spread
- 1 cup white chocolate chips
Instructions
- Prep your space by lining two baking sheets with parchment paper.
- Combine the Rice Krispies and Honey Nut Cheerios in a large mixing bowl.
- Melt the peanut butter and Biscoff spread in a microwave-safe bowl for about 30 seconds, then stir.
- Mix it up by pouring the warm mixture over the cereal blend and folding until coated.
- Add the white chocolate chips and gently fold them into the mixture.
- Form small patties or balls with the mixture and place them on the prepared baking sheets.
- Chill in the refrigerator for about 30 minutes, until firm.
- Serve and enjoy, or store in an airtight container for up to a week.
Notes
You can add nuts, dried fruits, or coconut flakes for variations.
Nutrition
- Serving Size: 1 cookie
- Calories: 150
- Sugar: 10g
- Sodium: 100mg
- Fat: 7g
- Saturated Fat: 2g
- Unsaturated Fat: 5g
- Trans Fat: 0g
- Carbohydrates: 20g
- Fiber: 1g
- Protein: 3g
- Cholesterol: 0mg
Keywords: cookies, no-bake, snack, dessert, sweet treats