Brain Jello Mold: A Spooktacular Treat for Every Occasion!
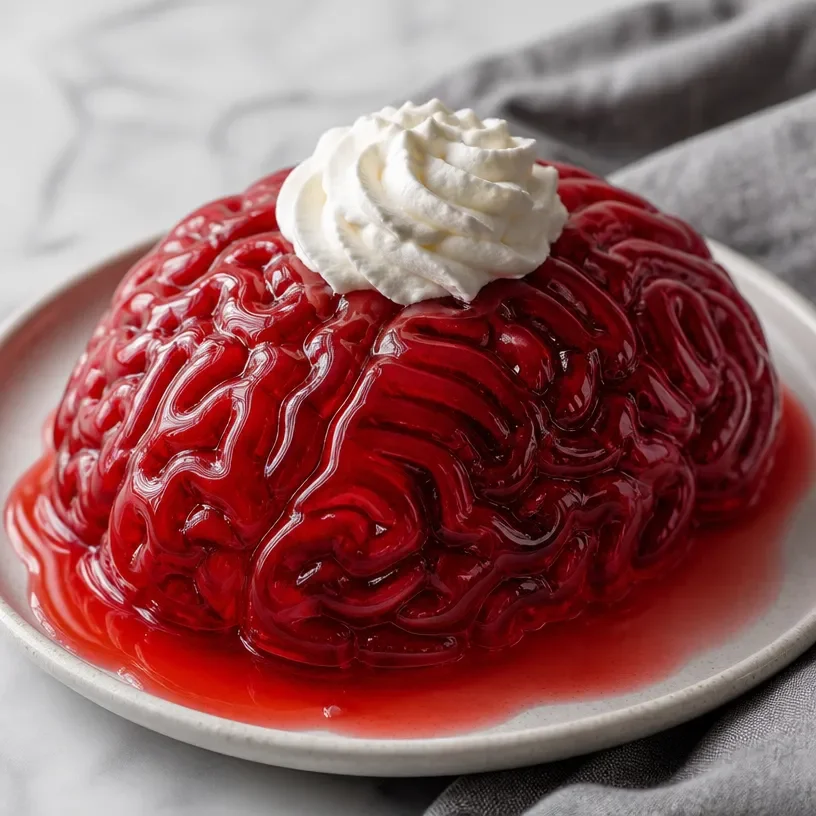
Hey there, fellow food lovers! It’s Nina from RusticFlavor, and today I’ve got a fun recipe that will not only tickle your taste buds but also bring a smile to your face—especially if you have a love for the quirky and delightful. We’re diving deep into the world of Brain Jello Mold, the perfect treat for Halloween, a themed party, or just to surprise your friends and family!
This dish is a celebration of creativity and nostalgia, bringing back memories of childhood parties filled with laughter and, yes, a little bit of silliness. So, put on your apron, grab your favorite playlist, and let’s make something fun together!
A Nostalgic Memory
Let me take you back to my childhood for a moment. I remember the first time I saw a jello mold at a family gathering. It was the late ’80s, and everything seemed a bit more whimsical back then. My aunt had made a spectacular and slightly wobbly gelatin dessert shaped like a brain, all glossy and frosty under the kitchen lights. The kids were both fascinated and grossed out, which made the whole thing even more thrilling!
That evening, we all gathered around the table, and nobody wanted to be the first to scoop a piece out. After all, who wants to be the one to “eat a brain”? But once someone finally went for it, the laughter erupted, and before long, the brain Jello was devoured with glee. It was more than just a dessert; it was an experience that added to our family lore.
Fast forward to today, I still whip up this fun-shaped treat for various gatherings—always with the same sense of excitement and, of course, a twinkle of nostalgia. After all, cooking is about creating memories as much as it is about flavors!
Ingredients
Here’s what you’ll need to create your own Brain Jello Mold:
- 2 boxes strawberry gelatin: The star of the show! You can use any flavor of gelatin you like, but strawberry gives that classic red color great for our mold.
- 4 cups boiling water: Essential for dissolving the gelatin. Make sure your water is at a rolling boil for the best results.
- Brain-shaped mold: You can find these at kitchen stores or online. If you can’t find one, any fun-shaped mold will work—just be creative!
- Whipped topping: This will act as the "brains" look after you unmold your jello. Plus, who doesn’t love a little sweetness on top?
Substitution Tips:
- If strawberries aren’t your jam, consider using raspberry or cherry gelatin for a similar look and taste.
- For a non-gelatin version, try using agar-agar; just follow the package instructions for quantities.
- Instead of whipped topping, serve with a dollop of yogurt for a tangy twist!
Step-by-Step Instructions
Now that we’ve got our ingredients ready, let’s get cooking!
-
Prepare Your Mold: Lightly grease your brain-shaped mold with non-stick cooking spray. This will help the gelatin release smoothly later on. A little tip: a silicone mold works wonders for easy removal!
-
Dissolve the Gelatin: In a large mixing bowl, pour the contents of the two boxes of strawberry gelatin. Next, carefully add your 4 cups of boiling water to the mix. Stir vigorously until the gelatin is completely dissolved. This is where the magic begins—the sweet aroma starts to fill your kitchen!
-
Chill Out: Once the gelatin has dissolved, let it cool down a bit at room temperature (no more than 15 minutes). Then, pour the mixture gently into your prepared mold. Be careful to not splash—nobody wants jello on their countertop!
-
Refrigerate: Now, transfer your mold to the refrigerator and let it chill for at least 4 hours, or until it is completely set. If you can, let it sit overnight for the best results.
-
Unmold the Fun: Once your jello is fully set, run a warm cloth around the outer edges of the mold to loosen the gelatin. Invert the mold onto a serving plate, and give it a gentle shake—your brain might just wiggle out smoothly!
-
Top It Off: Use a spatula to add a generous dollop of whipped topping on top as “brain” details. You could even use a food coloring gel to create more “veins” if you’re feeling extra artistic!
-
Serve and Enjoy: Cut into slices or serve whole. Grab a few friends and watch as their faces light up at your spooktacular creation!
Serving Suggestions
When it comes to serving your Brain Jello Mold, don’t hold back on the theatrics! Here are a few ideas to make your presentation pop:
- Garnish with Fresh Berries: Surround the base with strawberries or raspberries for a gorgeous burst of color.
- Spooky Toppers: Add gummy worms or chocolate spiders on top for added fun and surprise.
- Fear Factor: Set it in a themed setting—think skull plates or ghostly napkins to add that festive flair.
Recipe Variations
Ready to get creative? Here are a few twists on the classic Brain Jello Mold to keep things interesting:
-
Layered Gelatin: Make a layered version with different colors and flavors. Prepare each layer and let it set for about 30 minutes before pouring the next one to create a rainbow effect!
-
Fruit-Filled Brain: Before the jello sets completely, stir in diced fruit (strawberries or bananas work beautifully) for a fruity surprise. Just make sure your fruit pieces are small enough to fit well within the mold!
-
Savory Twist: For a more adult option, try a savory version using tomato juice and gelatin, seasoned with garlic and herbs. It could be an interesting appetizer that will get everyone talking!
-
Diet-Friendly: Use sugar-free gelatin and a whipped topping alternative to create a guilt-free version that doesn’t skimp on fun!
-
Unicorn Brain: Play with colors and flavors for a fun ‘unicorn’ twist! Layer different colors of jello to create a magical dessert that’s not just spooky, but whimsical too.
Chef’s Notes
Oh, the stories I could tell about my jello mishaps! I once got a little too confident and added too much boiling water to the gelatin. Let’s just say the jello was more of a soup situation. (Who knew wobbly brains could be so slippery?)
But that’s part of the fun! Cooking (and especially experimenting) is about learning along the way. Many of my favorite recipes are products of kitchen “oops!” moments, and I encourage you to embrace those, too. Plus, a silly accident often leads to a funny story at the dinner table!
Over the years, I’ve evolved this recipe from a simple mold into a dessert experience, inviting guests to be part of the fun. I find that cooking, especially whimsical recipes like this one, can turn an ordinary gathering into a cherished memory.
FAQs and Troubleshooting
Q: My jello didn’t set properly; what went wrong?
A: Make sure your boiling water is truly boiling and that the gelatin is fully dissolved. If it looks watery, it might need a little more chill time!
Q: How do I get the jello out of the mold?
A: Run warm water over the outside of the mold or give it a gentle shake. If it’s still stuck, you can try refrigerating it just a bit longer.
Q: Can I use other flavors for jello?
A: Absolutely! Feel free to experiment with your favorite jello flavors. Just keep in mind that color and sweetness may vary.
Q: How long will it keep?
A: Jello can typically last about 3-5 days in the fridge. But it’s so fun, I doubt it’ll last that long before it’s gobbled up!
Nutritional Info (optional)
This recipe is super fun but can also be tailored to be a lower-calorie option if you use sugar-free gelatin and light whipped topping or yogurt. Always a good idea in today’s world!
So there you have it—my Brain Jello Mold recipe! It’s fun, flavor-packed, and a fantastic way to bring laughter and joy into your kitchen. Don’t forget to share your creations with me; I’d love to see your spooktacular takes! Happy cooking, friends! Let’s make memories that will stick like jello on a sunny day!
— Nina 🍲✨
PrintBrain Jello Mold
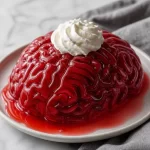
A whimsical brain-shaped jello mold that’s a perfect treat for Halloween or any themed party, bringing back childhood memories of fun and laughter.
- Prep Time: 15 minutes
- Cook Time: 0 minutes
- Total Time: 240 minutes
- Yield: 8 servings 1x
- Category: Dessert
- Method: Chilling
- Cuisine: American
- Diet: Vegetarian
Ingredients
- 2 boxes strawberry gelatin
- 4 cups boiling water
- Brain-shaped mold
- Whipped topping
Instructions
- Prepare your mold: Lightly grease your brain-shaped mold with non-stick cooking spray.
- Dissolve the gelatin: In a large mixing bowl, pour the contents of the two boxes of strawberry gelatin and add 4 cups of boiling water. Stir until dissolved.
- Chill out: Let the gelatin cool for 15 minutes, then pour into the prepared mold.
- Refrigerate: Chill in the refrigerator for at least 4 hours or overnight until set.
- Unmold the fun: Run a warm cloth around the mold edges, invert onto a plate, and gently shake to release.
- Top it off: Add a generous dollop of whipped topping as
Notes
For a fun twist, add diced fruits before the jello sets or experiment with different jello flavors.
Nutrition
- Serving Size: 1 slice
- Calories: 120
- Sugar: 24g
- Sodium: 20mg
- Fat: 1g
- Saturated Fat: 0g
- Unsaturated Fat: 1g
- Trans Fat: 0g
- Carbohydrates: 30g
- Fiber: 0g
- Protein: 2g
- Cholesterol: 0mg
Keywords: Brain Jello Mold, Halloween dessert, quirky recipes, gelatin dessert