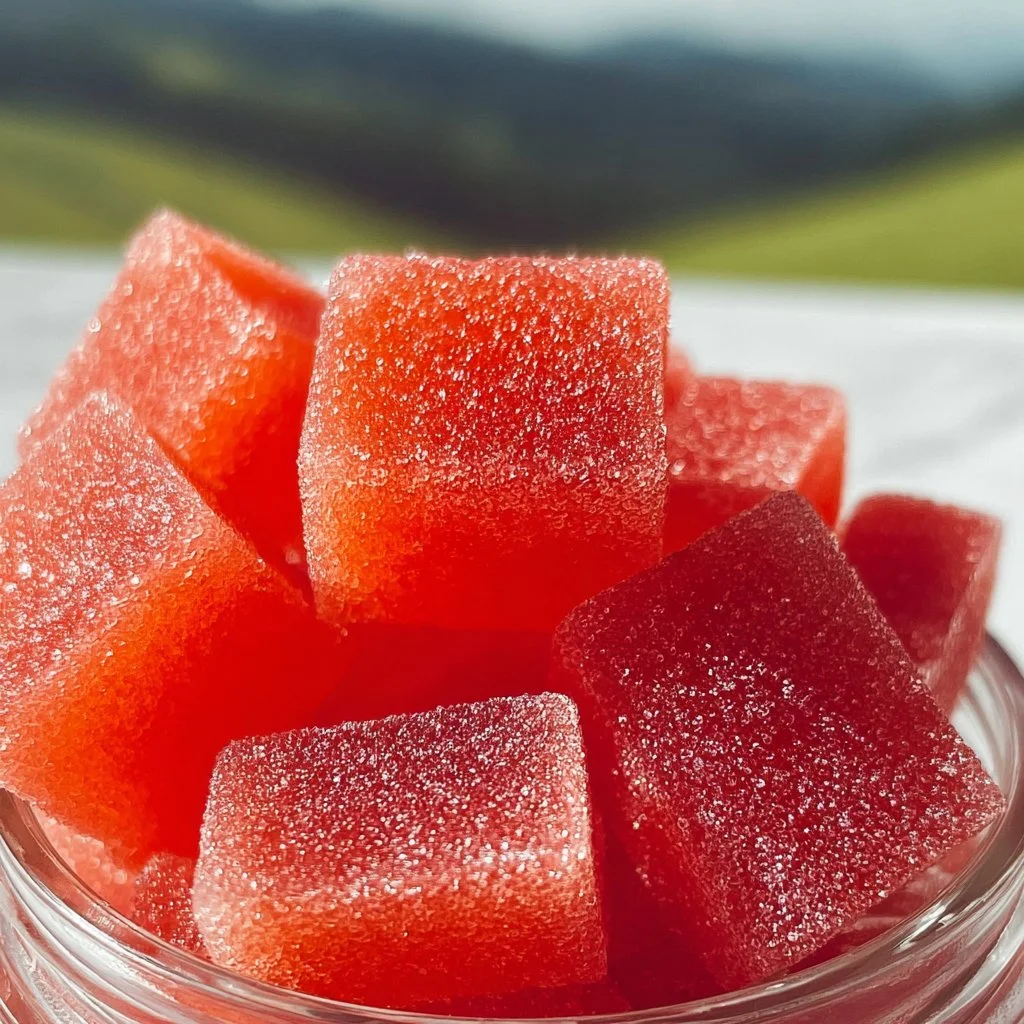
Easy Homemade Sour Watermelon Gummies
Hey there, fellow foodies! If you’re anything like me, summer brings a bounty of juicy, ripe fruits that just scream to be turned into something fun and delicious. Today, we’re diving into the world of homemade sour watermelon gummies! 🍉✨ These little treats are not only delightful but also made with wholesome ingredients that make them stand apart from your average gummy candy.
Let me tell you—making your own candy might sound daunting, but trust me, it’s easier than you think and so much better than store-bought. Plus, the joy of crafting a nostalgic childhood treat in your own kitchen is unbeatable.
A Sweet Memory
Growing up, watermelon was a staple in our home during the hot summer months. My siblings and I would gather our chairs around the picnic table, mom slicing up that vibrant, juicy fruit. The carefree days of summer were filled with laughter, sticky fingers, and the ever-so-popular water balloon fights!
One time, we had made a pact to create the most creative watermelon dessert for a backyard BBQ. Everyone brought their ‘A’ game, but I can’t forget how my cousin made these funky watermelon-shaped gummies with a slight sour twist. They were a hit, and ever since then, I’ve wanted to recreate that memory in my very own kitchen.
So, grab your aprons and let’s embark on a sweet and tangy journey of making sour watermelon gummies that will not only tantalize your taste buds but also bring a bit of nostalgia back to your dining table!
Ingredients
Here’s what you’ll need to make about 20-30 gummies, depending on your mold size:
-
4 cups Fresh Watermelon (chunked): Look for a ripe, sweet watermelon. It’s the star of our gummies! If watermelon isn’t in season, you can use a canned version, but ensure it’s packed in juice and not syrup.
-
2 cups Fresh Watermelon Juice: You’ll be blending the chunks to create juice. No juicer? No problem! A regular blender does the trick. Just blend and strain!
-
2 tablespoons Unflavored Gelatin Powder: This is our gelling agent. Make sure it’s unflavored to keep the taste pure. You can swap it with agar-agar if you want a vegan alternative; just follow the package instructions for the right quantities.
-
2 tablespoons Fresh Lemon Juice: Freshly squeezed is key here. It adds a delightful tang that balances the sweetness of the watermelon perfectly. Don’t have fresh lemons? Bottled lemon juice works, but the fresh stuff is always best.
-
Honey (optional): Use this if you’d like a touch of extra sweetness. You can substitute with maple syrup for a different flavor profile or omit it entirely if you prefer.

Step-By-Step Instructions
Now that you’ve got everything rounded up, it’s time to craft these delightful gummies!
-
Prepare the Watermelon Juice
Start by chopping your watermelon into small chunks. Toss them into a blender and blend until smooth. Don’t forget to taste and check the sweetness! Pour the mixture through a fine-mesh strainer into a bowl to catch any pulp. You should end up with about 2 cups of fresh watermelon juice. This is where the magic starts!Chef’s Tip: Use a spatula to press down on the pulp to extract more juice. Waste not, want not!
-
Mix with Gelatin
In a separate small bowl, sprinkle the unflavored gelatin powder over 1/2 cup of the fresh watermelon juice. Let it sit for about 5 minutes to bloom—the gelatin needs this time to hydrate and dissolve.Chef’s Hack: If you’re using agar-agar instead, prepare it according to the package directions as it usually requires heating in a double boiler before adding to juices.
-
Combine Ingredients
In a saucepan, pour in the remaining watermelon juice and heat it on medium-low until warm—not boiling. Remove from heat and add the bloomed gelatin mixture, lemon juice, and honey (if using). Stir until everything is well combined and ensure the gelatin is completely dissolved.Little secret: The warmer the juice, the quicker the gelatin dissolves. But be careful—no boiling!
-
Mold the Gummies
Get your gummy molds ready! Pour the mixture into your molds using a dropper or a small pouring jug for precision. Don’t worry if you spill a little—it’s all part of the fun!Pro Tip: If you have any leftover mixture, pour it into a small cup to taste-test your heavenly concoction before it sets!
-
Chill Out
Place your filled molds in the fridge and let them chill for about 2-3 hours until fully set. Patience is a virtue, but I promise it’ll be worth the wait! -
Pop Them Out
Once fully set, carefully pop the gummies out of the mold, and if you’re feeling fancy, you can toss them in a little extra sour sugar (just a mix of sugar and citric acid) for that extra zing!Chef’s Note: Use cornstarch to dust your molds lightly before pouring to make it easier to pop them out, especially if you’re using silicone molds.
-
Store and Enjoy
Keep your gummies stored in a sealed container in the fridge. They should last for about a week (if they don’t get gobbled up first!).
Serving Suggestions
Looking to impress at your next gathering? Consider serving your sour watermelon gummies in a fun way. Present them in little mason jars with colorful ribbons for a charming touch, or arrange them on a platter next to fresh watermelon slices and lemon wedges for a refreshing summer spread. These gummies can also be a part of a colorful charcuterie board—just mix in some nuts, seasonal fruits, and some cheese for a fabulous summertime snack!
Recipe Variations
-
Berry Twist: Add a 1/2 cup of pureed strawberries or blueberries into the mix for a berry-hued treat.
-
Minty Fresh: Toss in a few fresh mint leaves while heating the juice for a refreshing minty kick, then strain it out before pouring into molds.
-
Spicy Surprise: If you love a unique flavor, a pinch of chili powder can add a thrilling twist! Just a pinch goes a long way.
-
Citric Burst: Increase the lemon juice for even more of a sour hit, or try substituting some lemon juice with lime juice for a tropical vibe!
-
Coconut Water Combo: Substitute half of the watermelon juice with coconut water for a delightful tropical gummy that’s hydrating too!
Chef’s Notes
Every recipe I create is tinged with memories and a pinch of nostalgia. This sour watermelon gummy recipe started as a childhood dream and evolved into something that brings friends and family together. I love to watch people’s faces light up when they try these homemade gummies—it’s pure joy!
And yes, I’ve had my fair share of kitchen mishaps. One time, I forgot to bloom the gelatin. Let’s just say it didn’t turn out gummy at all, but a weird jelly-like substance instead—yikes! Live and learn, right?
FAQs and Troubleshooting
-
Can I use flavored gelatin instead of unflavored?
Absolutely! Just follow the package instructions; using flavored gelatin will give you a different taste. Keep in mind the sweetness level when adding honey. -
What if my gummies are too soft or too hard?
If they’re too soft, try adding a bit more gelatin next time. If they’re too hard, reduce the amount of gelatin and increase the watermelon juice. -
How do I store leftover gummies?
Keep them in an airtight container in the fridge, and they should last about a week. You can freeze them for longer storage, but I doubt they’ll last that long! -
Can I add other flavors like pineapple or orange?
Yes! You can easily incorporate other fruit juices, but keep in mind that they might change the taste profile. Experiment and find your favorite blend!
Nutritional Info (Optional)
While I won’t bore you with nutritional nerdiness, it’s worth noting that these gummies are much healthier than store-bought versions, being free of artificial colors and flavors. They’ll give you a satisfying sweet fix without the guilt. Plus, watermelon is hydrating and low in calories!
So gather your ingredients, and let’s create some delightful summer memories with these sour watermelon gummies! I’m excited for you to give this recipe a try.
Until next time—happy cooking! 🌟
PrintEasy Homemade Sour Watermelon Gummies

Delightful and wholesome homemade sour watermelon gummies that are fun to make and even better to enjoy.
- Prep Time: 15 minutes
- Cook Time: 5 minutes
- Total Time: 120 minutes
- Yield: 20-30 gummies 1x
- Category: Snack
- Method: Chilling
- Cuisine: American
- Diet: Vegetarian
Ingredients
- 4 cups Fresh Watermelon (chunked)
- 2 cups Fresh Watermelon Juice
- 2 tablespoons Unflavored Gelatin Powder
- 2 tablespoons Fresh Lemon Juice
- Honey (optional)
Instructions
- Prepare the Watermelon Juice: Chop watermelon into chunks and blend until smooth. Strain through a fine-mesh strainer to catch any pulp.
- Mix with Gelatin: Sprinkle gelatin powder over 1/2 cup of watermelon juice and let it bloom for 5 minutes.
- Combine Ingredients: Heat remaining watermelon juice in a saucepan, then remove from heat and stir in the bloomed gelatin, lemon juice, and honey.
- Mold the Gummies: Pour the mixture into molds using a dropper or small jug.
- Chill Out: Refrigerate molds for 2-3 hours until set.
- Pop Them Out: Carefully remove gummies from the molds.
- Store and Enjoy: Keep in a sealed container in the fridge for up to a week.
Notes
For an extra sour flavor, toss finished gummies in sour sugar (sugar with citric acid).
Nutrition
- Serving Size: 1 gummy
- Calories: 30
- Sugar: 6g
- Sodium: 2mg
- Fat: 0g
- Saturated Fat: 0g
- Unsaturated Fat: 0g
- Trans Fat: 0g
- Carbohydrates: 7g
- Fiber: 0g
- Protein: 1g
- Cholesterol: 0mg
Keywords: watermelon, gummies, homemade candy, summer treats, healthy snacks