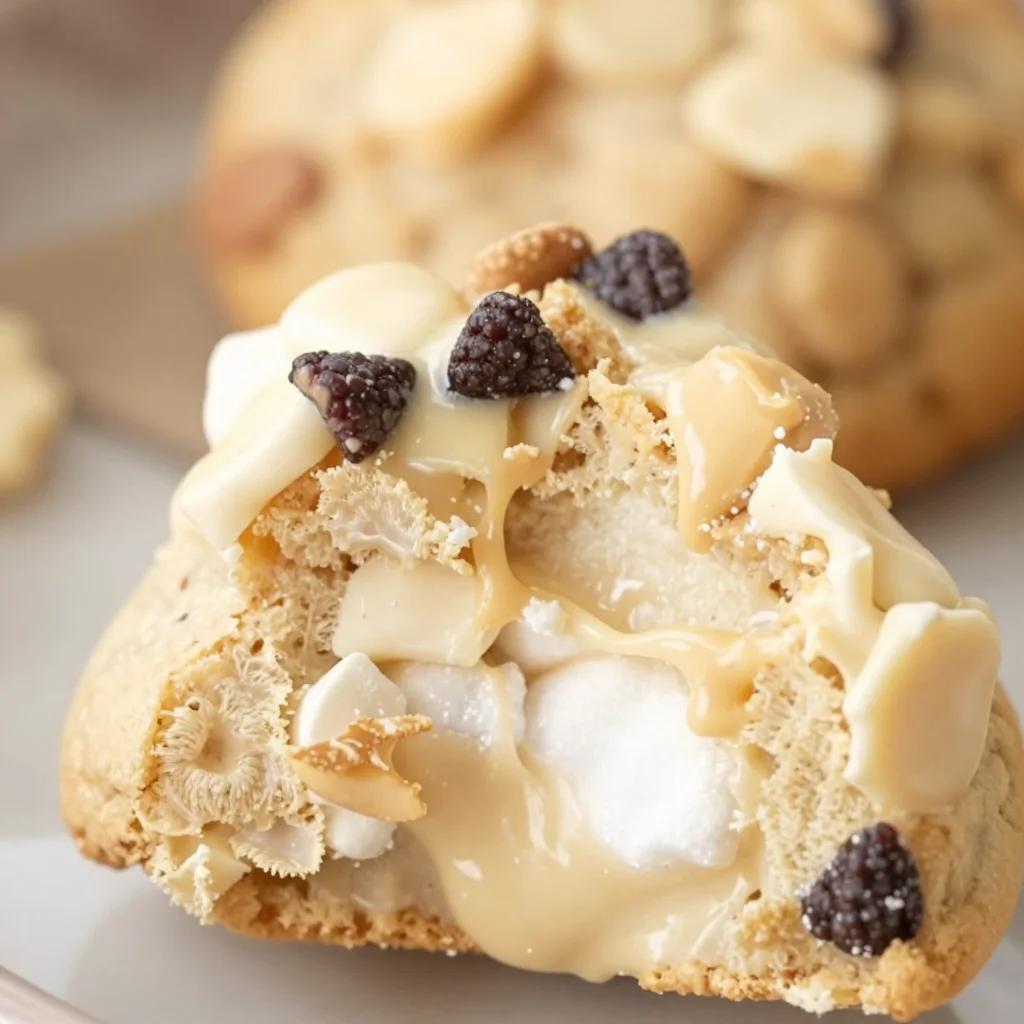
Avalanche Cookies: A Sweet Escape into Nostalgia
Hey there, fellow food lovers! I’m Nina from RusticFlavor, and today, I’m thrilled to share with you a delightful treat that packs a punch of flavors and memories: Avalanche Cookies! If you’re looking for a dessert that’s as easy to make as it is delicious, you’ve stumbled upon the right recipe. With their sweet crunch and nostalgia-inducing sweetness, these cookies are bound to become a staple at your table.
A Trip Down Memory Lane
I still remember the first time I made Avalanche Cookies—it was a chilly day during my childhood, with our home filled with the cozy scent of melting chocolate and roasted nuts. My mom had this go-to recipe that always brought warmth to our family gatherings. I can picture us all crowded around the kitchen island, eagerly waiting to sample the gooey goodness as she mixed in the last of the ingredients.
We’d pile the cookies high on a plate and settle into our living room, blankets wrapped around us, giggling and sharing stories, all while enjoying the delicious treats. Every bite was not just about satisfaction but also about love and connection—ingredients that truly matter, right? Fast forward to today, and I find myself sharing this same joy with you. Let’s dive into creating these nostalgic Avalanche Cookies together!
Ingredients
Here’s everything you need to whip up a batch of these delightful cookies:
-
2 cups cereal (like Rice Krispies or Cornflakes): These crunchy bits bring that satisfying texture to your cookies. You can also go for gluten-free cereals if needed!
-
1 cup white chocolate chips: These sweet morsels melt beautifully and add a creamy component. If you’re not a fan of white chocolate, feel free to swap for milk or dark chocolate chips.
-
1 cup peanut butter chips: For that peanut buttery goodness! Can’t find peanut butter chips? Chopped peanuts or even a drizzle of melted peanut butter will do the trick.
-
1 cup mini marshmallows: These little puffs add chewiness and sweetness. If you prefer a less sugary version, try using dehydrated marshmallows or leave them out entirely.
-
1/2 cup creamy peanut butter: This will bind everything together and provide fantastic flavor. For those with nut allergies, sunflower seed butter or almond butter can be great substitutes.
-
1/2 cup powdered sugar: This is key for sweetness and helps the cookies set. If you want a healthier option, feel free to use coconut sugar instead; just note that it might alter the color slightly.
-
1 teaspoon vanilla extract: A splash of vanilla takes the flavors up a notch! Use pure vanilla extract for the best taste, but imitation vanilla works too in a pinch.
Step-by-Step Instructions
Ready to get cooking? Let’s make some Avalanche Cookies!
-
Prepare the Pan
Grab a baking sheet and line it with parchment paper. This little trick will ensure your cookies do not stick and make cleanup a breeze! -
Mix Your Dry Ingredients
In a large mixing bowl, combine the cereal, white chocolate chips, peanut butter chips, and mini marshmallows. Give them a gentle toss to evenly distribute everything.Chef’s Tip: Use a spatula or your hands to combine. Sometimes, a little tactile approach works best!
-
Melt the Peanut Butter
In a microwave-safe bowl, combine the creamy peanut butter and powdered sugar. Microwave in 15-second bursts, stirring in between, until the mixture is smooth and slightly bubbly. This usually takes about 30-45 seconds total.Chef’s Hack: If you want to make it even easier, you can use a double boiler to melt the peanut butter over simmering water.
-
Combine Wet and Dry Ingredients
Pour the melted peanut butter mixture over your dry ingredients. Now, with gusto, mix everything together until it’s well incorporated and all the cereal is coated. This is where your arms will get a workout, but it’s so worth it! -
Scoop the Cookie Mixture
Using a cookie scoop or two spoons, drop rounded tablespoons of the mixture onto the lined baking sheet. Make sure to leave a little space between them—they will expand a bit!Little Secret: If the mixture is too sticky, wet your hands slightly to help shape them.
-
Chill Until Set
Once you’ve scooped all the cookies, pop the baking sheet in the fridge for about 30 minutes. This helps them firm up nicely. -
Enjoy
After chilling, these delightful Avalanche Cookies will be firm enough to munch on! Serve them right away or store them in an airtight container for later.
Serving Suggestions
These cookies are perfect for any occasion! Stack them on a festive plate for your next gathering, or kick back with a cup of coffee and indulge in a sweet moment for yourself. Feeling creative? Here are some fun serving ideas:
-
Pair with Milk: There’s nothing like dipping a chunk of your Avalanche Cookie into a cold glass of milk. Pure bliss!
-
Ice Cream Sandwich: Take two cookies and add a scoop of your favorite ice cream in between for an indulgent treat.
-
Boxed Gift: Package these goodies in a cute box and gift them to a friend or neighbor. Who doesn’t love receiving homemade treats?
Recipe Variations
Want to switch things up? Here are some creative twists to customize your Avalanche Cookies:
-
Add Nuts: Throw in a handful of chopped peanuts or even walnuts for a little extra crunch and flavor.
-
Fruity Twist: Mix in dried cranberries or chopped dried apricots for a burst of sweetness and chewiness.
-
Spice It Up: Consider adding a pinch of cinnamon or a splash of almond extract to switch up the flavor profile.
-
Colorful Fun: Toss in some colorful sprinkles or M&M’s before chilling for a festive touch!
-
Vegan Option: Substitute the white chocolate chips with dairy-free chocolate chips and use maple syrup instead of powdered sugar for a vegan-friendly treat!
Chef’s Notes
These Avalanche Cookies are incredibly flexible! I crafted this recipe years ago, and it has grown and evolved just like me. I used to follow my mom’s measurement closely, but now I trust my instincts. There’s something comforting about adjusting the recipe as you see fit—cooking should feel like an adventure!
Funny enough, the first time I brought these cookies to a potluck, I was so nervous I’d forget an ingredient that I triple-checked my list. Guess what? I accidentally grabbed my baking soda instead of powdered sugar, leaving me with a rather… interesting flavor profile. But hey, it became a running joke and a story that I still share today!
FAQs and Troubleshooting
1. Why are my Avalanche Cookies too sticky?
This can happen if the peanut butter is too warm when mixing. Ensure it has cooled slightly before adding it to the dry ingredients.
2. My cookies spread too much while chilling. What went wrong?
Make sure your cookie mixture is cool enough before you scoop them. A quick chill before shaping can help control spreading.
3. How should I store the cookies?
Keep your Avalanche Cookies in an airtight container at room temperature. They’re best enjoyed within a week, but I doubt they’ll last that long!
4. Can I freeze them?
Absolutely! You can freeze them for up to three months. Just layer with parchment paper in an airtight container, and they’ll be good to go for your next craving.

Nutritional Info
While I believe in enjoying treats in moderation, here’s a rough estimate of the nutritional info per cookie (assuming about 24 total cookies):
- Calories: 150
- Fat: 6g
- Carbohydrates: 20g
- Protein: 2g
- Sugar: 5g
Remember, these are based on my ingredient choices; for a more accurate count, use an app or calculator based on your exact additions!
There you have it, my friends! A cozy, mouthwatering recipe for Avalanche Cookies that’ll surely bring warmth to your home and smiles to your peeps. So, roll up your sleeves and give these a try—you won’t regret it. Happy baking! 🍪✨
PrintAvalanche Cookies

Delightful Avalanche Cookies that pack a punch of flavors and nostalgia, perfect for any occasion.
- Prep Time: 15 minutes
- Cook Time: 0 minutes
- Total Time: 45 minutes
- Yield: 24 cookies 1x
- Category: Dessert
- Method: No-Bake
- Cuisine: American
- Diet: Vegetarian
Ingredients
- 2 cups cereal (like Rice Krispies or Cornflakes)
- 1 cup white chocolate chips
- 1 cup peanut butter chips
- 1 cup mini marshmallows
- 1/2 cup creamy peanut butter
- 1/2 cup powdered sugar
- 1 teaspoon vanilla extract
Instructions
- Prepare the baking sheet by lining it with parchment paper.
- Mix the cereal, white chocolate chips, peanut butter chips, and mini marshmallows in a large bowl.
- Melt the peanut butter and powdered sugar in a microwave-safe bowl until smooth.
- Combine the melted peanut butter with the dry ingredients until fully mixed.
- Scoop rounded tablespoons of the mixture onto the lined baking sheet.
- Chill in the fridge for about 30 minutes.
- Enjoy the cookies once they are firm!
Notes
Store cookies in an airtight container at room temperature; they are best enjoyed within a week.
Nutrition
- Serving Size: 1 cookie
- Calories: 150
- Sugar: 5g
- Sodium: 100mg
- Fat: 6g
- Saturated Fat: 2g
- Unsaturated Fat: 4g
- Trans Fat: 0g
- Carbohydrates: 20g
- Fiber: 1g
- Protein: 2g
- Cholesterol: 0mg
Keywords: cookies, dessert, Avalanche Cookies, no-bake cookies, nostalgic treats