DIY Pizza Lunchable: A Family-Friendly Meal That’s Fun to Make and Eat!
Hey there, food lovers! Nina here, and today I’m excited to share one of my favorite simple and fun recipes that your kids will surely love—DIY Pizza Lunchables. Remember those store-bought lunch kits? While they’re quick and convenient, nothing beats the joy of crafting your very own pizza creations right at home! This recipe is not just about making food; it’s about making memories, too. Grab your aprons, gather your ingredients, and let’s get our pizza-making hats on!
A Slice of Nostalgia
Let me take you down memory lane. Growing up, there was something special about Saturday afternoons at my grandma’s house. As the sun streamed through the kitchen window, we’d gather around her rustic wooden table, bursting with laughter and curiosity. Grandma had this magical ability to turn simple ingredients into unforgettable meals. One of my absolute favorites was her homemade pizza.
She’d lay out a variety of toppings—everything from gooey mozzarella to zesty pepperoni—and we’d enthusiastically customize our own mini pizzas. The best part? The smell of baking dough that filled the kitchen while we awaited our delicious creations. That spirit of creativity and togetherness inspired me to embrace similar fun in my own kitchen!
With DIY Pizza Lunchables, not only will you replicate that experience but also create unforgettable family moments. Each bite will bring nostalgia back to life, and trust me, your kiddos will love being little chefs!
Gather Your Ingredients
Let’s pull together the delicious building blocks for your DIY Pizza Lunchables. Here’s what you’ll need:
-
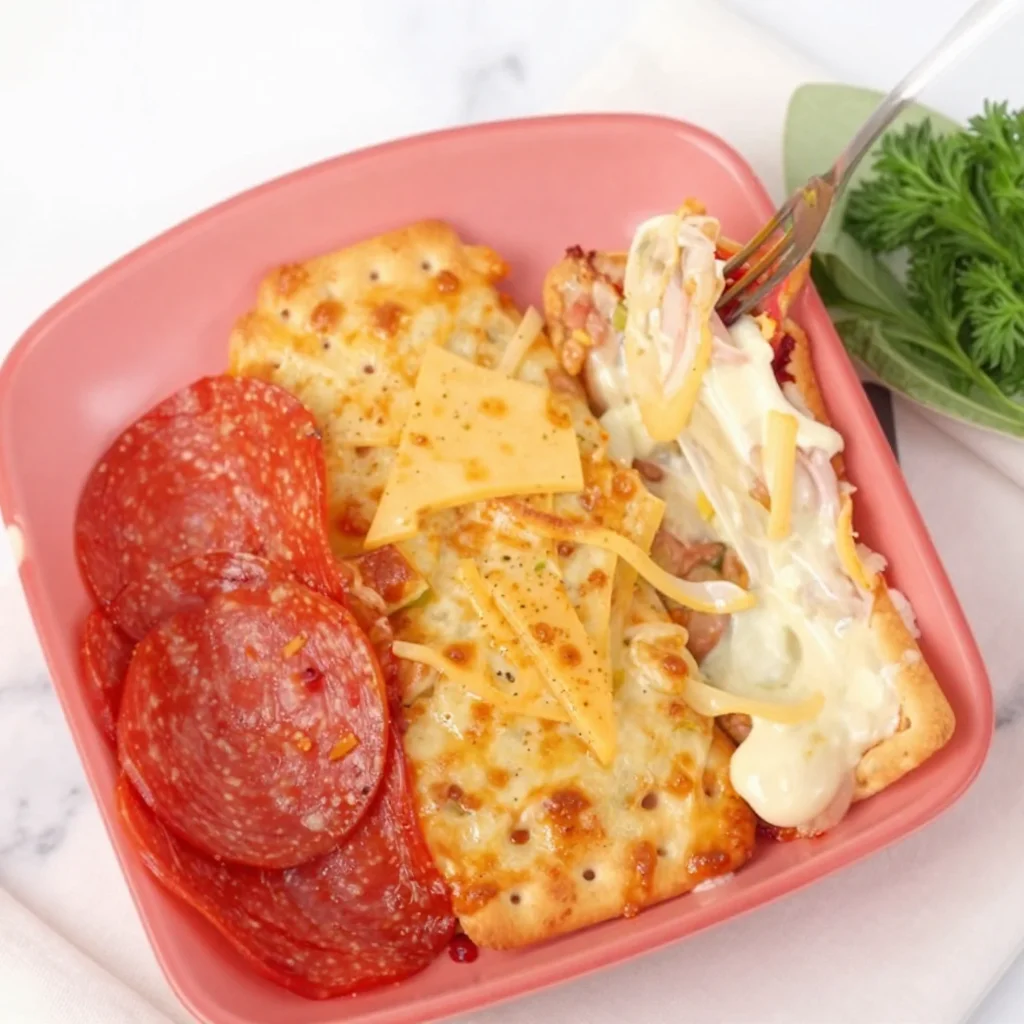
Crackers: Choose your favorite type—graham crackers for something sweet or whole grain for a healthier option. These will serve as our pizza base!
- Substitution Tip: You can also use mini pitas or tortilla chips for a fun twist!
-
Sliced Cheese: Mozzarella is classic, but feel free to mix it up with cheddar, pepper jack, or even dairy-free cheese.
- Chef Insight: Look for cheese with less processed components for a more authentic flavor!
-
Pepperoni or Other Toppings: Classic pepperoni is always a hit, but you can include turkey pepperoni, salami, or cooked sausage for a different vibe.
- Substitution Tip: If you’re going veggie, think olives, bell peppers, or artichokes!
-
Pizza Sauce: You can buy your favorite brand or whip up a quick homemade version by mixing tomato sauce with Italian seasoning.
- Chef Insight: A little bit of honey mixed in can give your sauce a rich and balanced sweet flavor.
-
Vegetables (Optional): Get creative! Cherry tomatoes, sliced bell peppers, or even spinach can add that colorful crunch to your creations.
- Substitution Tip: Any fresh veggies you have on hand will be great—experiment and make it yours!
Step-by-Step Instructions
Now that we have our ingredients lined up, let’s dive into the fun part—assembling our DIY Pizza Lunchables!
-
Prep Your Workspace: Clear off a space at your countertop and gather all your ingredients. This will make the assembly process super smooth and enjoyable!
-
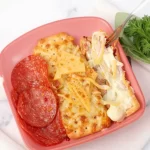
Start with the Crackers: Lay out your selected crackers neatly on a cutting board or directly on your plates. Think of them like your personal pizza canvases!
-
Spread the Pizza Sauce: Grab a spoon or a small spatula, and generously spread a layer of pizza sauce over each cracker. Remember, the sauce acts as a base, so you want it to cover most of the surface!
-
Layer on the Cheese: Time to get cheesy! Place a slice or two of your chosen cheese atop each cracker. If you’re feeling extra adventurous, don’t hesitate to mix and match different kinds!
-
Add Your Toppings: This is where the creativity shines! Sprinkle your pepperoni or other toppings over the cheese as generously as you like. And don’t forget those colorful veggies for an extra crunch!
-
Bake or Serve Cold: Here’s your choice! You can either bake them at 350°F (175°C) for around 5-10 minutes until the cheese is melted and bubbly or keep them cold for a refreshing snack. If you’re going with baking, keep an eye on them—nobody likes burnt pizza!
-
Enjoy Together: Serve with a side of extra pizza sauce for dipping and watch the smiles as everyone builds their perfect pizza bites.
Serving Suggestions
Now that your DIY Pizza Lunchables are ready to be devoured, how can you plate or serve them? Here are some fun ideas:
- Charcuterie Style: Arrange your pizzas alongside a colorful selection of fruits, nuts, and crudités for a fun snack board that everyone can enjoy.
- Themed Meal Night: Make it a pizza-themed night by pairing with an Italian-themed movie. It’ll set a cozy vibe and amplify the experience!
- Personal Touches: Consider giving each family member their own plate with their name on it—let them know these creations are just as special as they are!
Recipe Variations
Ready to mix things up? Here are some creative twists you can try:
-
Sweet Pizzas: Swap the pizza sauce for Nutella and top with sliced fruits like bananas, strawberries, and drizzle with honey for a sweet treat!
-
Mediterranean Style: Use hummus as your base, top with feta, olives, cucumbers, and tomatoes for a savory flair.
-
Breakfast Pizza: Try scrambled eggs over the crackers, add a sprinkle of cheese, and layer with crispy bacon bits or spinach.
-
Spicy Caliente: Add jalapeños, spicy sausage, or hot sauce for those who enjoy a kick in their pizza bites!
-
Gluten-Free Options: Use gluten-free crackers or make mini polenta bases for your pizzas to cater to dietary needs.
Chef’s Notes
Throughout my cooking adventures, I’ve found that the key ingredient in any meal is love and laughter. DIY Pizza Lunchables are the perfect way to engage with family in the kitchen. As you relish the process, don’t worry about perfection—imperfect pizzas made with joy are the most delicious!
And just a little funny kitchen side note: I once attempted to make pitta bread from scratch for a pizza night and ended up with a flour explosion all over my kitchen! My daughter and I had quite the laughs while cleaning up the mess, but hey, at least we had our pizza snack to munch on in the process. Embrace the little mishaps—they often lead to the sweetest memories!
FAQs and Troubleshooting
Here are a few questions you might have as you embark on your DIY Pizza Lunchable journey:
Q: Can I prepare the ingredients ahead of time?
A: Absolutely! Prepped toppings and sauce can be stored in the fridge and assembled quickly for busy days.
Q: What if my kids only want certain toppings?
A: Kids are picky, and that’s okay! Tailor it to their tastes, but encourage them to try new ingredients by making the experience fun and exploratory.
Q: Can these be made vegan?
A: Definitely! Use plant-based cheese, and ensure your crackers and sauce fit a vegan diet. There are so many delicious options available now!
Q: How can I prevent soggy crackers?
A: If you choose to bake them, keep an eye on the baking time. You can also toast the crackers lightly before adding toppings for added crunch!
Nutritional Info (Optional)
Servings: 4
Calories per serving (4 crackers, with cheese and toppings): Approximately 300 calories
This is a rough estimate and will vary by ingredients used. Focus on balance—pair these pizzas with a side of fresh veggies for a complete meal!
And there you have it: DIY Pizza Lunchables! A delightful project for any family kitchen, it’s all about creativity and connection around the table. Whether you’re enjoying them cold, hot, or with a twist, I hope you create lasting memories just like I did with my grandma. Happy cooking, and let’s make those flavors rustic and unforgettable! 🍕✨
PrintDIY Pizza Lunchables
A fun and creative recipe for making your own pizza lunchables at home, perfect for family bonding and delicious snacking.
- Prep Time: 15 minutes
- Cook Time: 10 minutes
- Total Time: 25 minutes
- Yield: 4 servings
- Category: Snack
- Method: No cooking required, optional baking
- Cuisine: Italian
- Diet: Vegetarian
Ingredients
- Crackers (graham crackers or whole grain)
- Sliced Cheese (mozzarella, cheddar, pepper jack, or dairy-free cheese)
- Pepperoni or Other Toppings (turkey pepperoni, salami, or cooked sausage)
- Pizza Sauce (store-bought or homemade with tomato sauce and Italian seasoning)
- Vegetables (optional: cherry tomatoes, sliced bell peppers, or spinach)
Instructions
- Prep your workspace: Clear off a space at your countertop and gather all your ingredients.
- Start with the crackers: Lay out your selected crackers neatly.
- Spread the pizza sauce: Add a layer of pizza sauce over each cracker.
- Layer on the cheese: Place a slice or two of your chosen cheese atop each cracker.
- Add your toppings: Sprinkle pepperoni or other toppings over the cheese.
- Bake or serve cold: Bake at 350°F (175°C) for 5-10 minutes or keep them cold.
- Enjoy together: Serve with extra pizza sauce for dipping.
Notes
Get creative with toppings and enjoy making memories together! Consider sweet variations with Nutella or Mediterranean styles with hummus.
Nutrition
- Serving Size: 4 crackers per serving
- Calories: 300
- Sugar: 4g
- Sodium: 450mg
- Fat: 15g
- Saturated Fat: 7g
- Unsaturated Fat: 6g
- Trans Fat: 0g
- Carbohydrates: 35g
- Fiber: 2g
- Protein: 10g
- Cholesterol: 20mg
Keywords: pizza, lunchables, kids meal, family recipe, fun cooking