The Luscious Black Velvet Cake: A Slice of Nostalgia
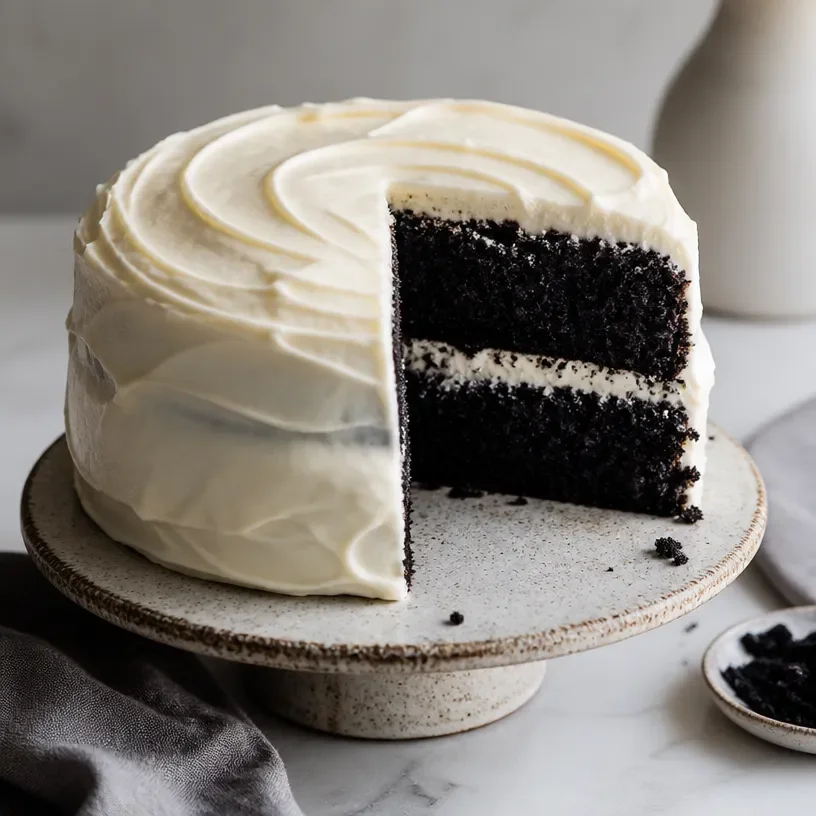
Hello, foodie friends! 🌟 Today, we’re diving into a delectable dessert that holds a special place in my heart: Black Velvet Cake. When you hear “velvet,” you might think of smooth textures and rich flavors, and trust me, this cake delivers on every level. Its deep, dark color and fluffy texture make it a showstopper, and it’s oh-so-delicious!
A Walk Down Memory Lane
Let me whisk you away to my childhood—a time when the kitchen felt like a cozy hug. One of my most cherished memories revolves around my grandmother’s kitchen. She had this funny little saying: “A little chocolate never hurt anyone!” She believed every celebration was a reason to whip up something sweet, and her specialty was a rich chocolate cake infused with a touch of magic—literally, it was black like the night!
I remember the first time she introduced me to Black Velvet Cake. I’d peek over the counter, the warm aromas enveloping me like a soft blanket. Grandmother would chuckle, “This one’s for special occasions, Nina!” And oh, how special it was! The combination of silky cream cheese frosting and the moist, flavorful cake brought friends and family together, filling our home with laughter and love.
Now, armed with that nostalgic inspiration, I’m sharing my modern take on the classic Black Velvet Cake. So, roll up your sleeves; let’s bake something magical together!
Ingredients
Here’s what you’ll need to create this incredible Black Velvet Cake:
-
2 1/2 cups all-purpose flour
Chef Insight: This is what gives the cake its structure! If you need a gluten-free option, try using a gluten-free flour blend. -
1/4 cup unsweetened cocoa powder
Tip: Make sure to use quality cocoa for that rich chocolate flavor. Dutch-processed cocoa can give a deeper color and flavor. -
Black food coloring (gel recommended)
Substitution: If you prefer natural coloring, you can reduce cocoa and add activated charcoal, but the flavor won’t be the same, of course! -
2 large eggs
Note: Room temperature eggs mix better with batter, yielding a more uniform texture. -
1 cup buttermilk
Chef Hack: You can make a quick substitute by mixing 1 tablespoon of white vinegar and adding it to 1 cup of milk—let it sit for 5 minutes! -
Cream cheese frosting (store-bought or homemade)
Quick Tip: I often whip up a batch of homemade frosting, but in a pinch, store-bought works just fine.
Step-by-Step Instructions
Let’s get to the good part—the baking! Follow along as we bring this cake to life.
-
Preheat the Oven
Preheat your oven to 350°F (175°C). This step is crucial because it ensures even baking. While your oven warms up, grease and flour two 9-inch round cake pans. -
Mix the Dry Ingredients
In a large bowl, whisk together the flour, cocoa powder, and a pinch of salt. This helps aerate the flour, making it easier to combine later. The aroma will already begin to take you on a chocolatey journey! -
Combine the Wet Ingredients
In another bowl, beat the eggs and sugar until light and fluffy. Add in the buttermilk and a few drops of black food coloring. Don’t be shy with the food coloring—this cake is meant to be dramatic! -
Bring It All Together
Gradually add the dry mixture to the wet ingredients, mixing just until combined. Overmixing can lead to a dense cake, and that’s a no-no! Use a spatula or a wooden spoon for gentle folding. -
Pour into Pans
Divide the batter evenly between your prepared pans. Pop them in the oven and bake for 25-30 minutes, or until a toothpick inserted in the center comes out clean. -
Cool and Prepare
Once baked, let the cakes cool in their pans for about 10 minutes. Then, transfer them to a wire rack to cool completely. This waiting game is tough, I know, but trust me, it’s worth it! -
Frost the Cakes
Once cooled, generously slather one layer with cream cheese frosting, stack the second layer on top, and finish frosting the top and sides. Don’t worry about making it perfect—rustic is the name of the game!
Serving Suggestions
Now for the fun part! When serving your beautiful Black Velvet Cake, try placing it on a rustic wooden cake stand or a colorful platter. Dust the top with a little cocoa powder or powdered sugar for a touch of elegance. Serve it alongside a cup of hot coffee or a scoop of vanilla ice cream for a delightful contrast. Gather your friends and family; it’s time to share the love!
Recipe Variations
Feeling a bit adventurous? Here are some creative twists you can try on my Black Velvet Cake:
-
Chocolate Ganache Drizzle: Top your frosted cake with a rich chocolate ganache for even more decadence. Simply melt equal parts chocolate and cream, then pour over the cake.
-
Add Espresso: For a mocha flavor, add a shot of espresso or finely ground coffee to the batter. It’s like a secret ingredient that elevates the chocolate!
-
Nutty Crunch: Incorporate chopped pecans or walnuts into the batter or sprinkle them on top for a lovely crunch.
-
Fruit Filling: Add layers of raspberry or cherry preserves in between the cake layers for a fruity surprise.
-
Vegan Option: Replace eggs with flax eggs (1 tablespoon flaxseed meal mixed with 2.5 tablespoons water per egg) and use almond milk instead of buttermilk for a fantastic vegan version.
Chef’s Notes
This Black Velvet Cake recipe is one I’ve honed over the years. I remember one of my first attempts ended up as a chocolate pancake instead of a cake—let’s just say not all my experiments were successful! But each misstep taught me something new about baking.
The beauty of this cake is how adaptable it is. It’s like a canvas for your creativity! As I grew in my cooking journey, I learned that it’s the love and intention you pour into your dishes that truly matter. So, don’t stress about perfection—embrace your kitchen adventures!
FAQs and Troubleshooting
Q1: Why did my cake come out dense?
A: Dense cake often results from overmixing the batter or not enough leavening agents. Ensure you gently fold your ingredients and double-check your baking powder or baking soda’s freshness.
Q2: Can I use regular milk instead of buttermilk?
A: Yes, buttermilk adds acidity that helps with leavening. If you don’t have buttermilk, make a substitute by adding vinegar or lemon juice to regular milk.
Q3: How can I store the cake?
A: Store your cake in an airtight container at room temperature for up to 3 days. If you need longer storage, refrigerate it for about a week, or you can freeze it!
Q4: What if I don’t have black food coloring?
A: While traditional recipes call for black food coloring for that signature look, you can try using extra cocoa powder (reducing other liquid slightly) to achieve something similar—but the color will be more of a dark brown.
Nutritional Info
While I believe in enjoying everything in moderation, here’s the nutritional info per slice if we get down to it:
- Calories: ~350 (varies with frosting and portion size)
- Total Fat: 15g
- Saturated Fat: 7g
- Carbohydrates: 50g
- Sugar: 30g
- Protein: 3g
Conclusion
So there you have it—my recipe for the Black Velvet Cake that has brought joy and comfort to my kitchen. I hope this cake becomes a staple in your home, perfect for gatherings or a quiet evening with a cup of tea. Remember, cooking should be enjoyed and shared. Let this be a reminder that food isn’t just about the ingredients; it’s about the stories, laughter, and memories created around the table. Happy baking, my friends! 🍰✨
PrintLuscious Black Velvet Cake
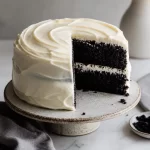
A modern take on a nostalgic Black Velvet Cake, featuring rich chocolate flavor and creamy frosting.
- Prep Time: 15 minutes
- Cook Time: 30 minutes
- Total Time: 45 minutes
- Yield: 12 servings 1x
- Category: Dessert
- Method: Baking
- Cuisine: American
- Diet: Vegetarian
Ingredients
- 2 1/2 cups all-purpose flour
- 1/4 cup unsweetened cocoa powder
- Black food coloring (gel recommended)
- 2 large eggs
- 1 cup buttermilk
- Cream cheese frosting (store-bought or homemade)
Instructions
- Preheat your oven to 350°F (175°C). Grease and flour two 9-inch round cake pans.
- Mix the dry ingredients: whisk together flour, cocoa powder, and a pinch of salt.
- Combine the wet ingredients: beat the eggs and sugar until light and fluffy, then add in buttermilk and black food coloring.
- Bring it all together by gradually adding the dry mixture to the wet ingredients, mixing until just combined.
- Pour the batter evenly between the prepared pans and bake for 25-30 minutes.
- Cool the cakes in their pans for 10 minutes, then transfer to a wire rack to cool completely.
- Frost the first layer with cream cheese frosting, stack the second layer, and frost the top and sides.
Notes
For serving, dust with cocoa powder or powdered sugar and pair with coffee or ice cream.
Nutrition
- Serving Size: 1 slice
- Calories: 350
- Sugar: 30g
- Sodium: 360mg
- Fat: 15g
- Saturated Fat: 7g
- Unsaturated Fat: 5g
- Trans Fat: 0g
- Carbohydrates: 50g
- Fiber: 2g
- Protein: 3g
- Cholesterol: 70mg
Keywords: black velvet cake, dessert, chocolate cake, nostalgic recipe, baking