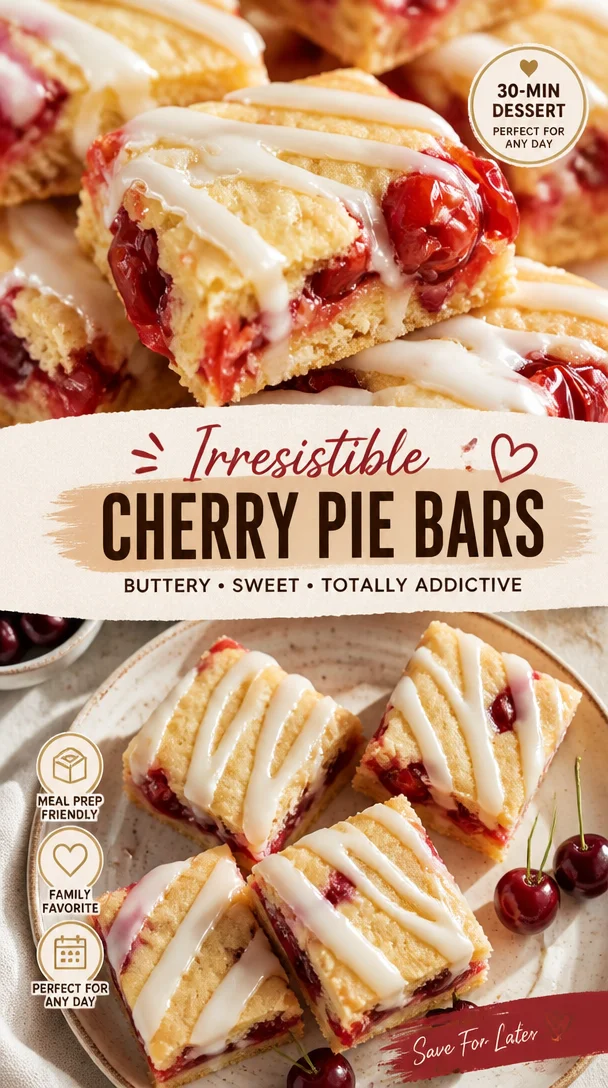
Cherry Pie Bars: A Slice of Nostalgia
Hello, cherry lovers and food enthusiasts! 🍒 Today, I’m excited to share one of my all-time favorite desserts: Cherry Pie Bars. These delightful treats are the perfect combination of sweet, tart cherries enveloped in a buttery crust. Plus, they scream comfort and nostalgia, transporting you back to lazy summer days and warm kitchen aromas. So, grab a comfy chair, a cup of coffee (maybe a slice of pie too?), and let’s dive right into the heart of this cherry affair!
A Personal Touch: Memories in Every Bite
When I think about cherry pie, I can’t help but get whisked away in memories of my childhood summer vacations. Picture this: warm sun, a gentle breeze wafting through the trees, and a kitchen bustling with family. My grandmother—an absolute wizard with pastries—would make her famous cherry pie, and the whole house would be filled with the sweetest, most intoxicating aroma you could imagine.
One particular summer, she decided to teach me the secrets behind her pie crust. She was patient, guiding my little hands as we mixed the dough and rolled it out. We used fresh cherries she had picked from a nearby orchard, and the experience was nothing short of magical.
Now, I’m passing on that lovely energy to you! These Cherry Pie Bars are not only a nod to my grandmother’s legacy, but they’re also an easy way for you to create joyful memories in your kitchen. Let’s roll up those sleeves and make something delicious together!
Ingredients: What You’ll Need
To create these delectable Cherry Pie Bars, gather the following ingredients:
- 2 cups all-purpose flour: This is the backbone of our crust. If you’re gluten-free, try using a gluten-free all-purpose blend.
- 1 cup sugar: This sweetener is essential for a balanced flavor. You can substitute with coconut sugar for a lower-glycemic option.
- 1/2 cup unsalted butter, softened: Butter brings richness. You can replace it with coconut oil for a dairy-free version, but the flavor may be slightly different.
- 1 egg: This helps bind everything together. For a vegan twist, a flax egg (1 tablespoon flaxseed meal mixed with 2.5 tablespoons water) works well.
- 1/2 teaspoon salt: A pinch enhances the flavors. No substitute needed here!
- 1 teaspoon baking powder: This little agent gives our bars a nice lift.
- 1 can (21 ounces) cherry pie filling: You can opt for homemade filling if you have fresh cherries!
- Powdered sugar for dusting (optional): A lovely finishing touch if you’re looking to impress!
Step-by-Step Instructions: Let’s Get Cooking!
Alright, let’s get down to business! Follow these simple steps to whip up these irresistible Cherry Pie Bars.
Step 1: Preheat Your Oven
Start by preheating your oven to 350°F (175°C). This crucial step ensures that your bars bake evenly and reach that perfect golden-brown crust.
Step 2: Prepare the Baking Dish
Grease a 9×13 inch baking dish with non-stick spray or line it with parchment paper for easy removal once they’re baked. If you’re using parchment, make sure to leave some overhang for easy lifting!
Step 3: Mix the Dry Ingredients
In a large mixing bowl, combine the flour, sugar, salt, and baking powder. Whisk these together until well mixed—this helps to distribute the baking powder evenly throughout the flour, setting the stage for those perfectly fluffy bars.
🍒 Chef’s Tip: If you have a flour sifter, give the dry ingredients a quick sift! It’ll make for a lighter texture.
Step 4: Add the Butter and Egg
Next, add your softened butter and egg into the dry mix. Using a pastry cutter, fork, or your hands (my favorite method), mix until crumbly. You want it to look like small peas, which means it’s perfectly ready to go!
Step 5: Create the Crust Layer
Take about two-thirds of this mixture and press it firmly into the bottom of your prepared baking dish. This will be the crust part, so don’t be shy—make sure it’s even and compact!
Step 6: Spread the Cherry Filling
Now it’s time for the star of the show! Pour your cherry pie filling evenly over the pressed crust. You can get a little creative here; gently spread it out to cover every inch. If you’re feeling adventurous, toss in some fresh cherries or a sprinkle of cinnamon for an extra twist!
Step 7: Crumble the Top Layer
Take the remaining crumb mixture and sprinkle it over the cherry filling. This will form a delicious crumbly topping that complements the tangy cherries perfectly.
Step 8: Bake to Perfection
Pop your baking dish into the preheated oven and bake for about 40-45 minutes, or until the top is golden brown and the filling is bubbling. The smell wafting through your kitchen at this point? Pure bliss!
🔥 Chef’s Hack: Set a timer! Ovens can be tricky, and you don’t want to miss that perfect moment.
Step 9: Cool and Dust
Once baked, let the bars cool in the pan for at least 20 minutes. If you can wait, chill them in the fridge for another hour. This helps them firm up for perfect slicing! Before serving, dust with powdered sugar for that lovely finishing touch.
Serving Suggestions: Make it Special
When it comes to serving these Cherry Pie Bars, here are a few ideas to make the presentation pop:
- Plate with Style: Cut the bars into squares and arrange them on a beautiful platter. A sprinkle of fresh cherries or mint leaves can add a lovely garnish!
- Add Ice Cream: Serve warm with a scoop of vanilla ice cream perched on top—it creates a dreamy combination of flavors and temperatures.
- Tea Time Treat: Pair them with your favorite herbal tea for a cozy afternoon snack.
Recipe Variations: Keep it Fun!
- Peach Pie Bars: Swap the cherry filling for peach filling for a delicious summer twist.
- Mixed Berry Bars: Use a combination of blueberries, raspberries, and strawberries for a mixed berry experience!
- Chocolate Chip Cherry Bars: Stir in some chocolate chips for a decadent variation—chocolate and cherry are a match made in heaven.
- Nutty Crust: Add crushed nuts like almonds or walnuts into your crust mixture for an extra crunch.
- Vegan Version: Substitute the egg with a flax egg and use coconut oil instead of butter to make these bars completely plant-based.
Chef’s Notes: A Little Extra Love
These Cherry Pie Bars have a special place in my heart and have evolved over the years. Initially, I used a more complicated recipe with a lattice crust, but I learned that simplicity often yields the best comfort food—something I cherish.
One funny memory that still makes me smile is the time I tried to impress my friends by making a cherry pie from scratch. Let’s just say that it didn’t quite go as planned, and I ended up with a gooey mess! But with these bars, you really can’t go wrong. They’re forgiving, easy to make, and always a crowd-pleaser.
FAQs and Troubleshooting
Q: Can I use fresh cherries instead of canned pie filling?
A: Absolutely! If using fresh cherries, pit and slice them, then mix them with a bit of sugar, cornstarch, and lemon juice before spreading them on the crust.
Q: How do I store leftover bars?
A: Store any leftovers in an airtight container in the fridge, where they’ll keep for about 3-4 days. They can also be frozen for up to 3 months—perfect for those surprise dessert cravings!
Q: What if my crust is too crumbly?
A: If your dough is too crumbly, it may need a splash of cold water or another egg yolk. Just be careful not to add too much liquid!
Q: How can I tell when the bars are done baking?
A: They’re done when the top is golden brown and you can see the filling bubbling. A toothpick inserted in the crust should come out clean!
Nutritional Info (Optional)
While the nutritional values will vary based on substitutions and serving sizes, here’s a rough estimate per serving (1 square out of 12):
- Calories: 200
- Fat: 8g
- Carbohydrates: 30g
- Protein: 2g
- Sugar: 10g
Conclusion
And there you have it—a warm, simple recipe for Cherry Pie Bars that’s just bursting with flavor and memories. These bars aren’t just about satisfying your sweet tooth; they are about creating moments with loved ones, savoring every bite, and remembering why we all love cooking.
So go forth, my fellow foodies! Bring these bars into your home, share them with friends and family, and bask in the joy of creating something delightful. Until next time, happy cooking!
— Nina 🍒✨
PrintCherry Pie Bars
Delicious Cherry Pie Bars combining sweet and tart cherries in a buttery crust, perfect for nostalgic moments.
- Prep Time: 15 minutes
- Cook Time: 45 minutes
- Total Time: 60 minutes
- Yield: 12 servings 1x
- Category: Dessert
- Method: Baking
- Cuisine: American
- Diet: Vegetarian
Ingredients
- 2 cups all-purpose flour
- 1 cup sugar
- 1/2 cup unsalted butter, softened
- 1 egg
- 1/2 teaspoon salt
- 1 teaspoon baking powder
- 1 can (21 ounces) cherry pie filling
- Powdered sugar for dusting (optional)
Instructions
- Preheat your oven to 350°F (175°C).
- Grease a 9×13 inch baking dish with non-stick spray or line it with parchment paper.
- Mix the flour, sugar, salt, and baking powder in a large bowl.
- Add the softened butter and egg into the dry mix and mix until crumbly.
- Create the crust layer by pressing two-thirds of the mixture into the bottom of the prepared baking dish.
- Spread the cherry pie filling evenly over the pressed crust.
- Crumble the remaining crumb mixture over the cherry filling.
- Bake for 40-45 minutes until golden brown and bubbling.
- Cool for at least 20 minutes before dusting with powdered sugar and slicing.
Notes
Try serving warm with vanilla ice cream for a delightful treat.
Nutrition
- Serving Size: 1 square
- Calories: 200
- Sugar: 10g
- Sodium: 150mg
- Fat: 8g
- Saturated Fat: 5g
- Unsaturated Fat: 3g
- Trans Fat: 0g
- Carbohydrates: 30g
- Fiber: 1g
- Protein: 2g
- Cholesterol: 30mg
Keywords: cherry pie bars, dessert, summer recipe, nostalgic dessert, easy baking