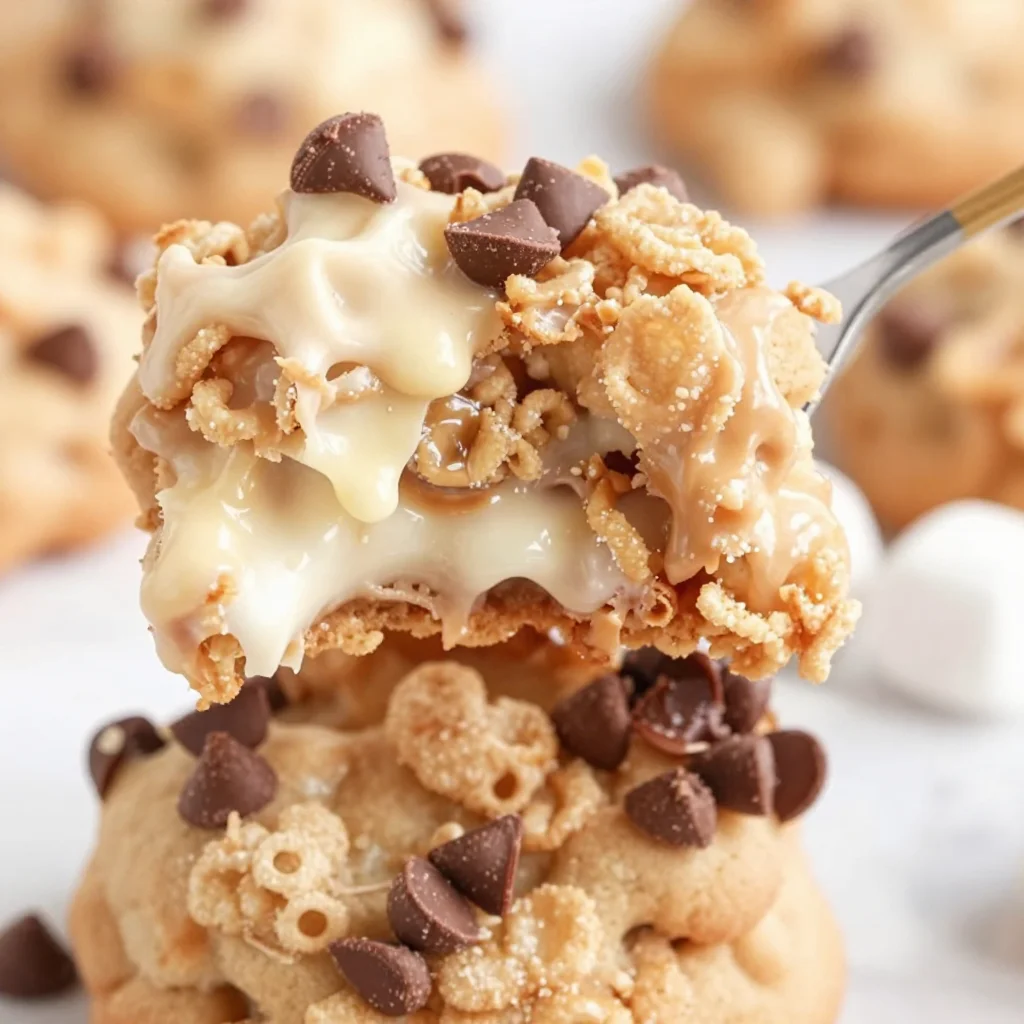
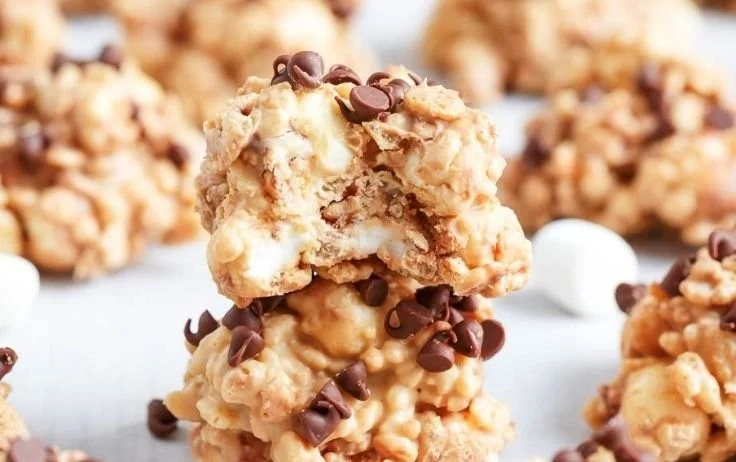
No Bake Avalanche Cookies: Easy, Delicious, and Oh-So-Memorable!
Hey there, fellow food lovers! It’s your friend Nina from RusticFlavor, and today I’m going to share a treat that brings back some of my fondest culinary memories: No Bake Avalanche Cookies. These delightful cookies are a perfect mashup of creamy, crunchy, and sweet — they’ll have you reminiscing about childhood moments while gathering around the kitchen table. Let’s dive in and make something truly special together!
A Sweet Memory: The First Time I Made No Bake Avalanche Cookies
I still remember the first time I whipped up a batch of these no-bake goodies. It was a cozy Saturday afternoon, and the rain drummed softly against the window as I rummaged through the pantry, looking for something sweet to satisfy our family cravings. My mom always had a knack for throwing things together in the kitchen, and I wanted to emulate her style.
After spotting the Rice Krispies and chocolate chips, inspiration struck! I decided to create my version of a no-bake treat. The joy of mixing those simple ingredients and watching them come together was magical. And oh boy, when I took that first bite, it was pure bliss! The blend of creamy peanut butter, crunchy cereal, and melty chocolate felt like a warm hug on a rainy day. That day sparked my passion for sharing easy, comforting recipes, and now I’m excited to share it with you!
Ingredients
Before we jump into the fun part, let’s gather our ingredients. Here’s what you’ll need for these luscious No Bake Avalanche Cookies:
-
3 cups Rice Krispies
A classic cereal that adds the perfect crunch. If you’re looking for a gluten-free version, you can swap it with gluten-free puffed rice or cornflakes. -
1 cup creamy white chocolate chips
These add a sweet and creamy flavor. If you’re not a fan of white chocolate, feel free to switch it out for dark or semi-sweet chocolate chips. -
1/2 cup peanut butter
This gives the cookies a rich, nutty flavor. If you have nut allergies, sunflower seed butter or almond butter can work as fantastic substitutes! -
1 cup mini marshmallows
They bring a fun chewy texture to the mix. If you want a twist, consider using flavored marshmallows or skipping them entirely for a less sweet version. -
1/2 cup chocolate chips
Because who can resist chocolate? If you’re looking to cut back on sugar, you can use sugar-free chocolate chips or even chopped dark chocolate.

Step-by-Step Instructions
Alright, let’s get cooking (or rather, no cooking in this case!). Follow these simple steps to create your No Bake Avalanche Cookies:
-
Prepare Your Workspace
Clear your countertops and gather all your ingredients. Keeping everything at arm’s reach makes the process smoother. A clean workspace truly sets the tone for fun cooking! -
Melt the Peanut Butter and White Chocolate Chips
In a microwave-safe bowl, combine the peanut butter and white chocolate chips. Heat in 30-second intervals, stirring in between until melted and smooth. You don’t want to overcook it; a little stirring goes a long way!Chef Tip: If it’s too thick, add a drizzle of vegetable oil or cocoa butter to loosen it up. The consistency should be creamy!
-
Combine the Ingredients
In a large mixing bowl, add your Rice Krispies and mini marshmallows. Pour the melted peanut butter and white chocolate mixture over the top. Stir gently with a spatula until everything is evenly coated.Tip: Make sure not to smash the cereal too much. You want to keep that light, airy crunch.
-
Add Chocolate Chips
Fold in the chocolate chips at the end. This helps them retain their shape without melting too much into the mix. You want melty bits in your cookies, but not a melt-down! -
Shape the Cookies
Line a baking sheet with parchment paper. Grab a spoon (or even better—your hands) and scoop about two tablespoons of the mixture into mounds on the baking sheet. You can shape them into balls or leave them as is!Little Chef Hack: Dampen your hands with a bit of cold water to keep the mixture from sticking, if you prefer handling it with your hands.
-
Chill Until Firm
Pop the baking sheet in the fridge for about 30 minutes or until the cookies firm up. This will help set the flavors and make them easier to handle. -
Enjoy!
Once chilled, take them out and indulge in the delightful bites you’ve created! These cookies are perfect for snack time, parties, or just a cozy evening at home.
Serving Suggestions
These No Bake Avalanche Cookies are pretty versatile when it comes to how you serve them. I love to arrange them in a cute dessert dish or stack them high on a tiered tray for a lovely presentation. Topping them with a dusting of powdered sugar or a drizzle of melted chocolate can elevate their appearance even more!
If you’re feeling festive, consider packing them into little mason jars tied with ribbons as gifts for friends or colleagues. It’s a sweet, homemade touch they’ll appreciate!
Recipe Variations
Now, let’s mix things up! Here are a few creative variations you might want to try:
-
Nutty Crunch: Add in a handful of chopped nuts such as almonds, walnuts, or pecans for an extra crunch and a bit of healthy fat.
-
Coconut Bliss: Mix in some shredded coconut for a tropical flair. This works fantastically with white chocolate and peanut butter!
-
Trail Mix Mix-Up: Combine a variety of add-ins like dried fruit, seeds (pumpkin or sunflower), and chocolate-covered raisins for a fun trail mix-inspired cookie.
-
Matcha Green Tea: For a unique twist, you could add a teaspoon or two of matcha powder to the melted peanut butter and chocolate mixture. It’ll give a vibrant green color and an earthy flavor!
-
Probiotic Power: Looking for a health boost? Swap a part of the white chocolate with a yogurt-covered raisin or use Greek yogurt in place of peanut butter (though you’ll need to chill it longer to set properly).
Chef’s Notes
As I’ve crafted these cookies over the years, I’ve found that the joy comes not just from what goes in them, but from the moments shared while making them. Sometimes, I’ll set up an outdoor picnic with family, where we pull out the batch and dive in. Other times, they serve as a pick-me-up during a long day of recipe testing.
One funny kitchen story: The first time I made these, I accidentally grabbed a bag of unflavored gelatin instead of marshmallows! Let’s just say the batch didn’t turn out as intended—who would’ve thought mixing gelatin with chocolate would lead to a bouncy concoction instead of chewy cookies?
So remember, even if things don’t go perfectly, the kitchen is a place for experimentation and fun!
FAQs and Troubleshooting
Here are some common questions I get about making No Bake Avalanche Cookies:
-
Why are my cookies falling apart?
If they’re not sticking together, it could be that you didn’t add enough peanut butter or melted chocolate. Make sure everything is well-coated. You can always add a bit more to bind them! -
Can I use different types of cereal?
Absolutely! Other cereals like Cheerios or Cornflakes can be substituted for a varied texture. Just keep the volume the same. -
How long do these cookies last?
When stored in an airtight container, these cookies can last up to one week in the fridge. They also freeze well—just make sure to layer them with parchment paper to avoid sticking. -
What happens if I skip the marshmallows?
Your cookies might be a bit less chewy and more crunchy. They still taste delicious, but the texture will change!
Nutritional Info (Optional)
For a general guide, here’s an approximate nutritional breakdown for one No Bake Avalanche Cookie (using standard ingredients). Keep in mind, variations will affect these counts!
- Calories: ~120
- Total Fat: 7g
- Saturated Fat: 3.5g
- Carbohydrates: 14g
- Sugars: 7g
- Protein: 2g
So there you have it! A cozy, heartwarming recipe for No Bake Avalanche Cookies that’s as fun to make as it is to eat. With every bite, you’re not only indulging in delightful flavors but also creating memories around the table. I can’t wait to hear how your creation turns out—happy cooking! 🍪✨
PrintNo Bake Avalanche Cookies

Delightful no-bake cookies with a creamy peanut butter and chocolate blend, with a crunch from Rice Krispies and a chewy texture from marshmallows.
- Prep Time: 15 minutes
- Cook Time: 0 minutes
- Total Time: 45 minutes
- Yield: 24 cookies 1x
- Category: Dessert
- Method: No-Bake
- Cuisine: American
- Diet: Vegetarian
Ingredients
- 3 cups Rice Krispies
- 1 cup creamy white chocolate chips
- 1/2 cup peanut butter
- 1 cup mini marshmallows
- 1/2 cup chocolate chips
Instructions
- Prepare Your Workspace: Clear your countertops and gather all your ingredients.
- Melt the Peanut Butter and White Chocolate Chips: In a bowl, microwave together until smooth.
- Combine the Ingredients: Add Rice Krispies and mini marshmallows, then pour melted mixture over the top.
- Add Chocolate Chips: Fold them in gently.
- Shape the Cookies: Scoop onto a baking sheet lined with parchment paper.
- Chill Until Firm: Refrigerate for about 30 minutes.
- Enjoy your delightful cookies!
Notes
Consider adding nuts, coconut, or even matcha for variations. Store in an airtight container for up to a week.
Nutrition
- Serving Size: 1 cookie
- Calories: 120
- Sugar: 7g
- Sodium: 50mg
- Fat: 7g
- Saturated Fat: 3.5g
- Unsaturated Fat: 2g
- Trans Fat: 0g
- Carbohydrates: 14g
- Fiber: 0g
- Protein: 2g
- Cholesterol: 0mg
Keywords: no bake cookies, avalanche cookies, easy dessert, playful treats, kids recipe