Avalanche Cookies: A Sweet Journey into Nostalgia
Ah, Avalanche Cookies! The name alone conjures up images of snowy peaks and warm kitchens filled with the smell of melting chocolate. These delightful treats have a special place in my heart, much like a cherished family recipe that gets passed down through generations, dusted with a bit of love and a generous sprinkle of nostalgia.
It was a chilly winter afternoon when I first tasted an Avalanche Cookie. My grandmother had invited us over, and the entire house was a cozy cocoon warmed by the oven and filled with laughter. She had me in charge of mixing ingredients—a task I took very seriously, donning a tiny apron (which was probably more charm than functionality) and a smile as big as the tray of cookies soon to emerge from the oven.
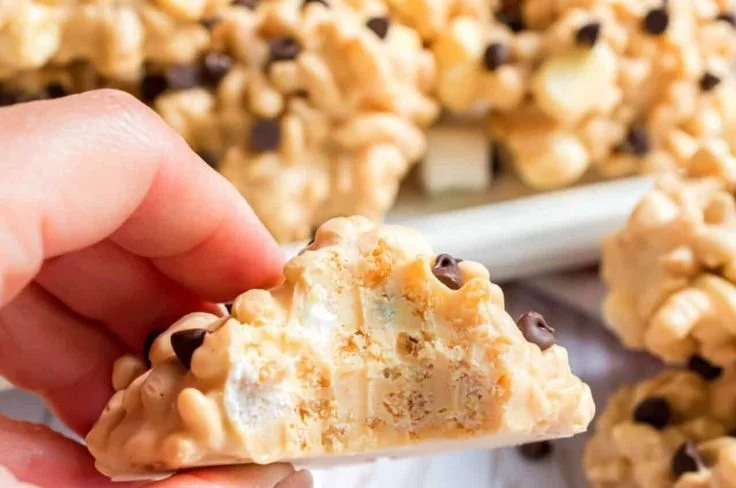
The recipe was simple, yet the flavors were unforgettable. Each nibble combined the crunch of rice cereal, the creaminess of peanut butter, and the sweetness of chocolate – a symphony for the palate! As my little hands mixed the gooey concoction, I could hardly wait to devour them fresh out of the pan. My grandma would serve them up on her favorite ceramic plates, which were chipped and cracked but held all the love from years of family gatherings. Fast forward to today, and those Avalanche Cookies have grown from being a wholesome kitchen memory to a beloved recipe shared with friends, both new and old.
Ready to create this wonderfully sweet and comforting treat that beckons the heart? Let’s dive into the details!
Ingredients
To make Avalanche Cookies that evoke comfort and joy, just gather the following ingredients:
-
2 cups rice cereal
- The foundational crunch of our cookies! If you’re looking to switch it up, you could use any puffed grain cereal—think puffed quinoa for a nutty alternative!
-
1 cup peanut butter
- This makes our cookies wonderfully creamy and indulgent. If you or someone you love has a nut allergy, feel free to swap it with sunflower seed butter or an equally creamy soy nut butter.
-
1 cup milk chocolate chips
- These melt beautifully for a smooth, sweet flavor. Dark chocolate chips or semi-sweet chocolate would also work if you’re in the mood for something less sweet!
-
1 cup white chocolate chips
- The contrast in flavor and color really makes these cookies pop. If you’re not a fan of white chocolate, you can replace it with more milk chocolate or get creative with butterscotch chips!
-
1/2 cup powdered sugar
- This adds just the right amount of sweetness and helps the mixture hold together. If you’re looking for a less sweet alternative, you can reduce it to 1/3 cup, or even try coconut sugar for a more complex taste.
-
1 teaspoon vanilla extract
- A crucial ingredient that ties everything together with a warm, inviting aroma. For a twist, you can experiment with almond extract for a completely different vibe.
Step-by-Step Instructions
Now that we’ve gathered our ingredients, let’s get cooking!
Step 1: Prepare Your Workspace
- Before we jump into mixing, make sure to clear your countertop or table space. Let’s keep things tidy and organized!
Step 2: Melt the Peanut Butter and Chocolate
- In a microwave-safe bowl, combine your peanut butter and half of both the milk chocolate and white chocolate chips. Microwave them on high for about 30 seconds, then stir. If you still see lumps, pop it back in for another 15-second interval until melted and smooth. This is where the magic begins!
Tip: Don’t rush this step—give it the time it needs to get that silky smooth texture. Stirring in between microwaving will help it melt evenly!
Step 3: Combine the Aforementioned Ingredients
- Add your powdered sugar and vanilla extract to the melted mixture. Stir until everything is smooth and well combined.
Chef Hack: Use a spatula to scrape the sides of the bowl to ensure you get every last bit of goodness mixed in!
Step 4: Mix in the Cereal
- Gently fold in the rice cereal using a spatula. Be careful not to crush the cereal too much; the added crunch is part of the appeal!
Come on, don’t be shy! Channel your inner child and mix it with all the enthusiasm—who knew cooking could feel this good?
Step 5: Form the Cookies
- Prepare a baking sheet lined with parchment paper. Scoop the mixture by tablespoons onto the sheet, shaping them into mountains (okay, maybe more "small hills" than true peaks!).
Tip: Dampen your hands a bit with water or oil to prevent the mixture from sticking when shaping!
Step 6: Finish with Chocolate!
- Now, melt the remaining chocolate chips—both milk chocolate and white chocolate—in separate bowls. Drizzle them over the cookie mounds for that aesthetic pop—who doesn’t love a little glam?
Step 7: Chill and Let Set
- Place the tray in the refrigerator for about 30 minutes, allowing the cookies to firm up properly.
Story Time: The first time my grandma made these, she forgot to chill them! We ended up scooping the soft mixture directly from the bowl—not the worst situation as they were just as delicious!
Serving Suggestions
Avalanche Cookies shine brightly when served with a cup of hot cocoa or a tall glass of milk. For a special touch, you can platter them up like a waterfall—stack them high and let the drizzled chocolate run down like a perfect topping! Want to wow your friends? Dust them with a light dusting of additional powdered sugar for that sweet finish.
Recipe Variations
Feeling adventurous or need to cater to dietary needs? Here’s how you can adapt these Avalanche Cookies:
-
Nut-Free Option: Substitute peanut butter with sunflower seed butter and ensure all your chocolate chips are nut-free.
-
Vegan Delight: Use dark chocolate chips, a plant-based butter, and powdered sugar without any animal-derived additives.
-
Add-In Extravaganza: Add dried fruits (like cranberries or raisins) or nuts (like walnuts or almonds) for added flavor and texture.
-
Leaner Version: Switch out half of the powdered sugar for unsweetened cocoa powder for a more chocolaty, less sweet profile.
-
Flavor Infusions: Add a splash of maple syrup or a pinch of sea salt to elevate the flavor profile further.
Chef’s Notes
Cooking is always about connection, and making Avalanche Cookies reminds me of those beautiful moments spent in my grandmother’s kitchen, filled with laughter and love. This recipe has evolved with me over time; now, it has become a favorite among my friends, who joke that they can’t come to my house without leaving with an Avalanche Cookie (or two!).
So, if life ever feels overwhelming, whip up a batch of these cookies and let the comforting flavors envelope you. And remember, if things don’t go quite as planned, just embrace the chaos—it’s what makes us all human!
FAQs and Troubleshooting
Q1: My cookies didn’t set properly. What happened?
- If your cookies are too soft, it’s likely that either the mixture wasn’t refrigerated long enough or there was too much peanut butter. Next time, try adding a bit more powdered sugar or chill for longer.
Q2: Can I use crunchy peanut butter instead of creamy?
- Absolutely! It’ll give you an extra layer of texture and flavor. Just make sure to choose a quality brand that isn’t too oily so the mixture holds together well.
Q3: How long do these cookies last?
- Storing them in an airtight container in the refrigerator, they should last about a week. But let’s be real—good luck keeping them around for that long!
Q4: Can I freeze the dough or the finished cookies?
- Yes, you can! Freeze the already made cookies in an airtight container for up to 3 months or freeze the dough before shaping them into cookies. Just thaw them in the fridge and then let them set!
Nutritional Info
Per cookie (assuming 12 cookies): approximately 150 calories, 9g fat, 15g carbohydrates, 3g protein.
Now that you’ve got your hands on this delightful Avalanche Cookie recipe, I hope you feel inspired to create something wonderful and cozy. Remember, cooking is about joy, connection, and maybe a bit of delicious messiness! So don your apron, gather your loved ones, and let’s make some unforgettable memories, one cookie at a time.
Happy Baking!
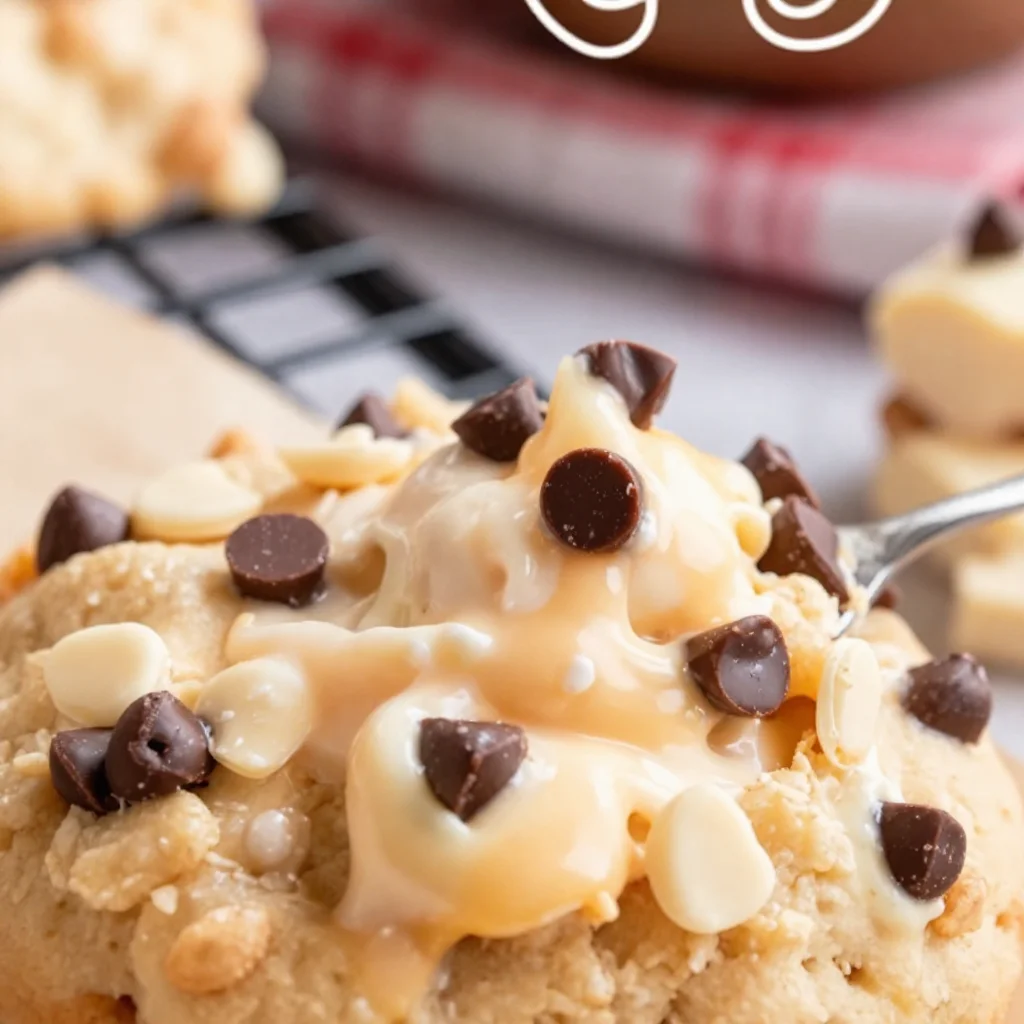
Avalanche Cookies

Delightful cookies combining rice cereal, peanut butter, and chocolate for a sweet and nostalgic treat.
- Prep Time: 15 minutes
- Cook Time: 30 minutes
- Total Time: 45 minutes
- Yield: 12 servings 1x
- Category: Dessert
- Method: No-Bake
- Cuisine: American
- Diet: Vegetarian
Ingredients
- 2 cups rice cereal
- 1 cup peanut butter
- 1 cup milk chocolate chips
- 1 cup white chocolate chips
- 1/2 cup powdered sugar
- 1 teaspoon vanilla extract
Instructions
- Prepare your workspace by clearing your countertop.
- Melt the peanut butter and half of both the milk chocolate and white chocolate chips in a microwave-safe bowl.
- Combine your powdered sugar and vanilla extract to the melted mixture.
- Mix in the rice cereal carefully, folding gently.
- Form the cookies by scooping the mixture onto a baking sheet lined with parchment paper.
- Finish with melted chocolate by drizzling it over the cookie mounds.
- Chill the tray in the refrigerator for about 30 minutes to set.
Notes
Cookies can also be served with hot cocoa or milk. Add a dusting of powdered sugar for a special touch.
Nutrition
- Serving Size: 1 cookie
- Calories: 150
- Sugar: 5g
- Sodium: 150mg
- Fat: 9g
- Saturated Fat: 3g
- Unsaturated Fat: 6g
- Trans Fat: 0g
- Carbohydrates: 15g
- Fiber: 1g
- Protein: 3g
- Cholesterol: 0mg
Keywords: cookies, dessert, sweet treat, no-bake, chocolate, nostalgic